

Salesforce
Overview:
Salesforce is a world-leading Customer Relationship Management (CRM) platform that helps businesses manage customer data, sales operations, and marketing leads. Integrating Wingify with Salesforce allows you to bridge the gap between your CRM data and your product experimentation.
What This Integration Achieves:
This integration allows you to use Salesforce Object Lists (like Leads, Accounts, or Opportunities) for Wingify feature flag targeting. By importing these lists into Wingify, you can roll out or test features for specific business segments (e.g., Qualified Leads, High-Value Accounts, or Enterprise Customers) and personalize product experiences based on their CRM status.
Key Benefits:
- CRM-based targeting: Run feature experiments specifically for users categorized in your Salesforce CRM.
- Account-level rollouts: Enable features for entire organizations based on Salesforce Account data.
- B2B Personalization: Deliver variations tailored to the lead status or opportunity stage (e.g., "Free Trial" vs "Qualified").
- Seamless Data Sync: Leverage Wingify's daily automatic sync to ensure your targeting reflects the latest changes in Salesforce.
Step 1: Enabling the Wingify-Salesforce Integration:
To enable the Wingify-Salesforce integration for your Wingify account:
- From the main menu of your Wingify dashboard, go to Configurations > Integrations.
- Click on the Salesforce integration and enable it by switching on the toggle.
- You will be auto-navigated to the Config tab.
- Select the Enable use of Salesforce object list for visitor targeting option and click Save.
Step 2: Authenticate Wingify on Salesforce:
-
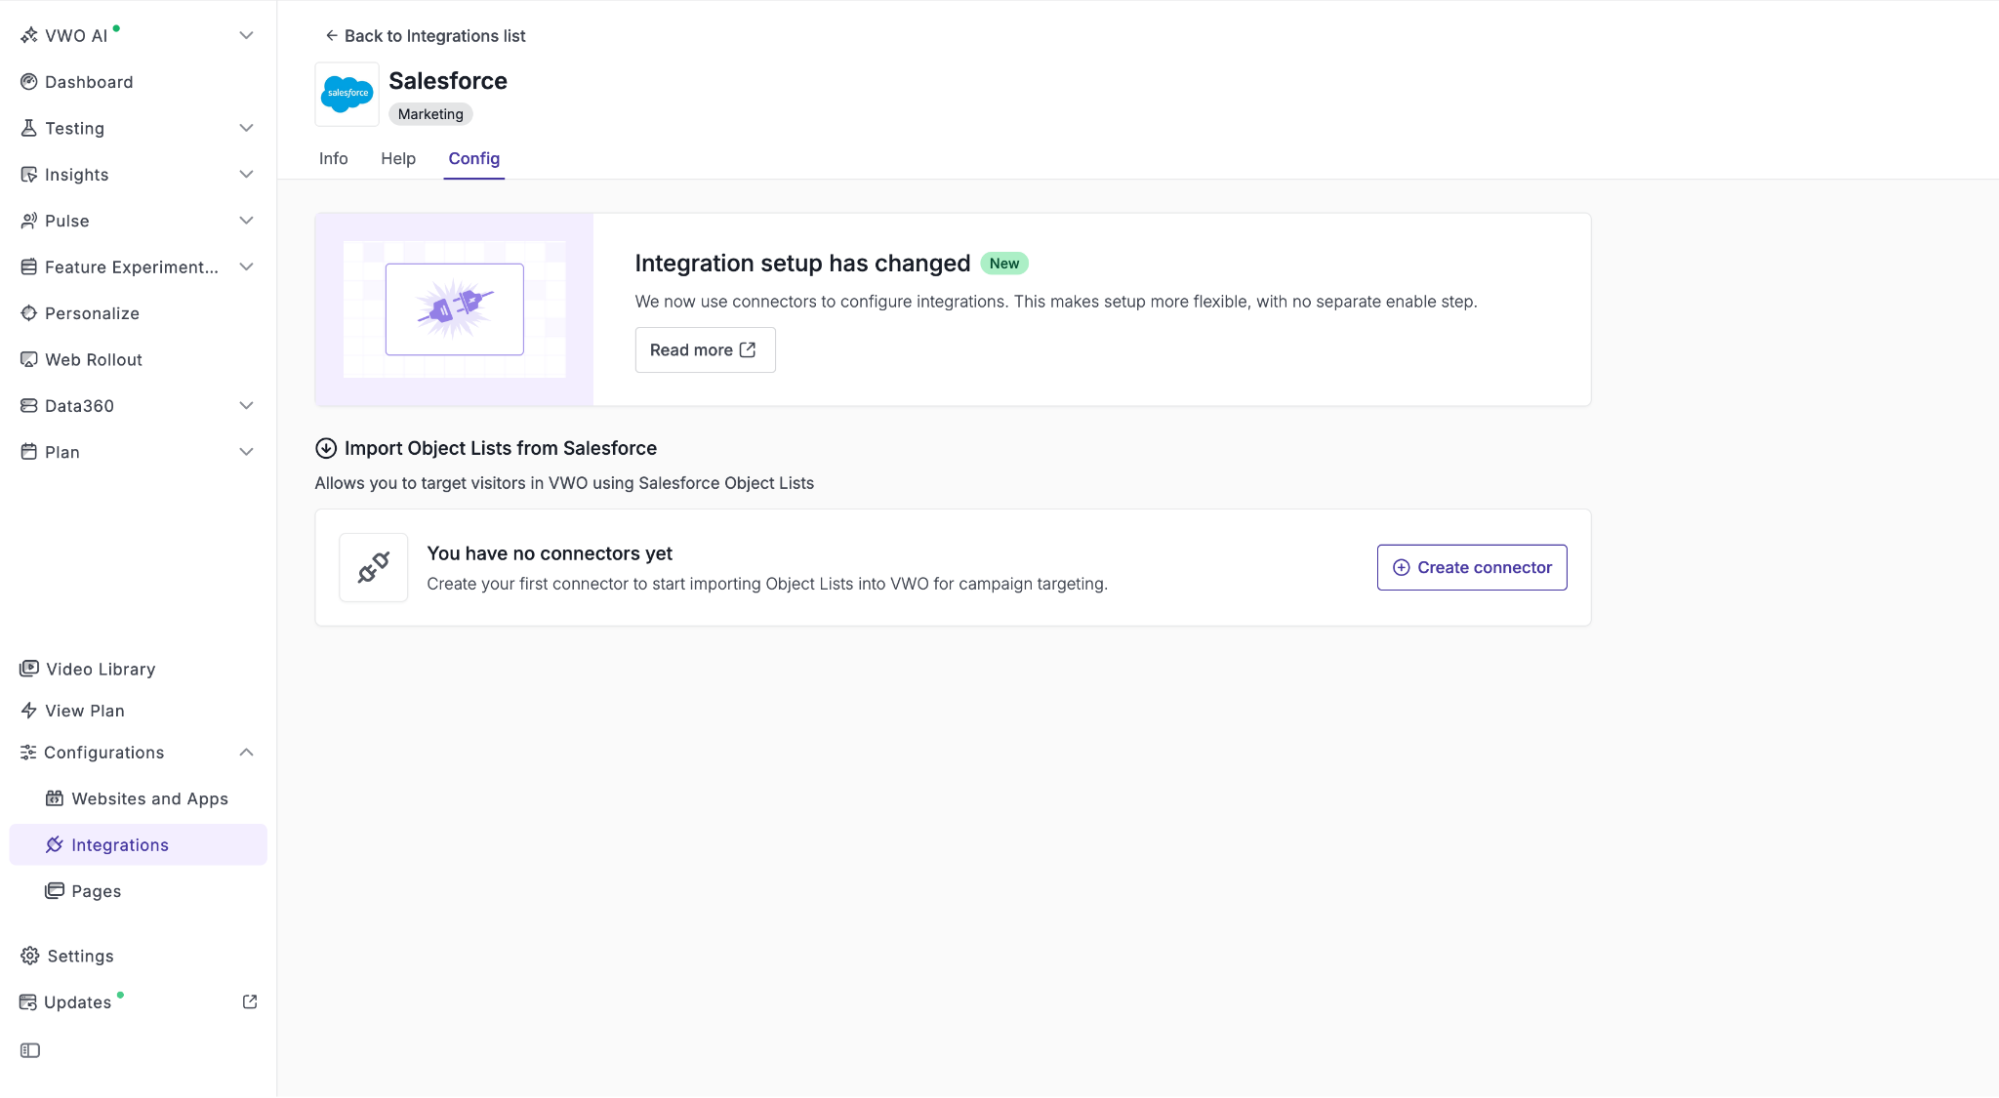
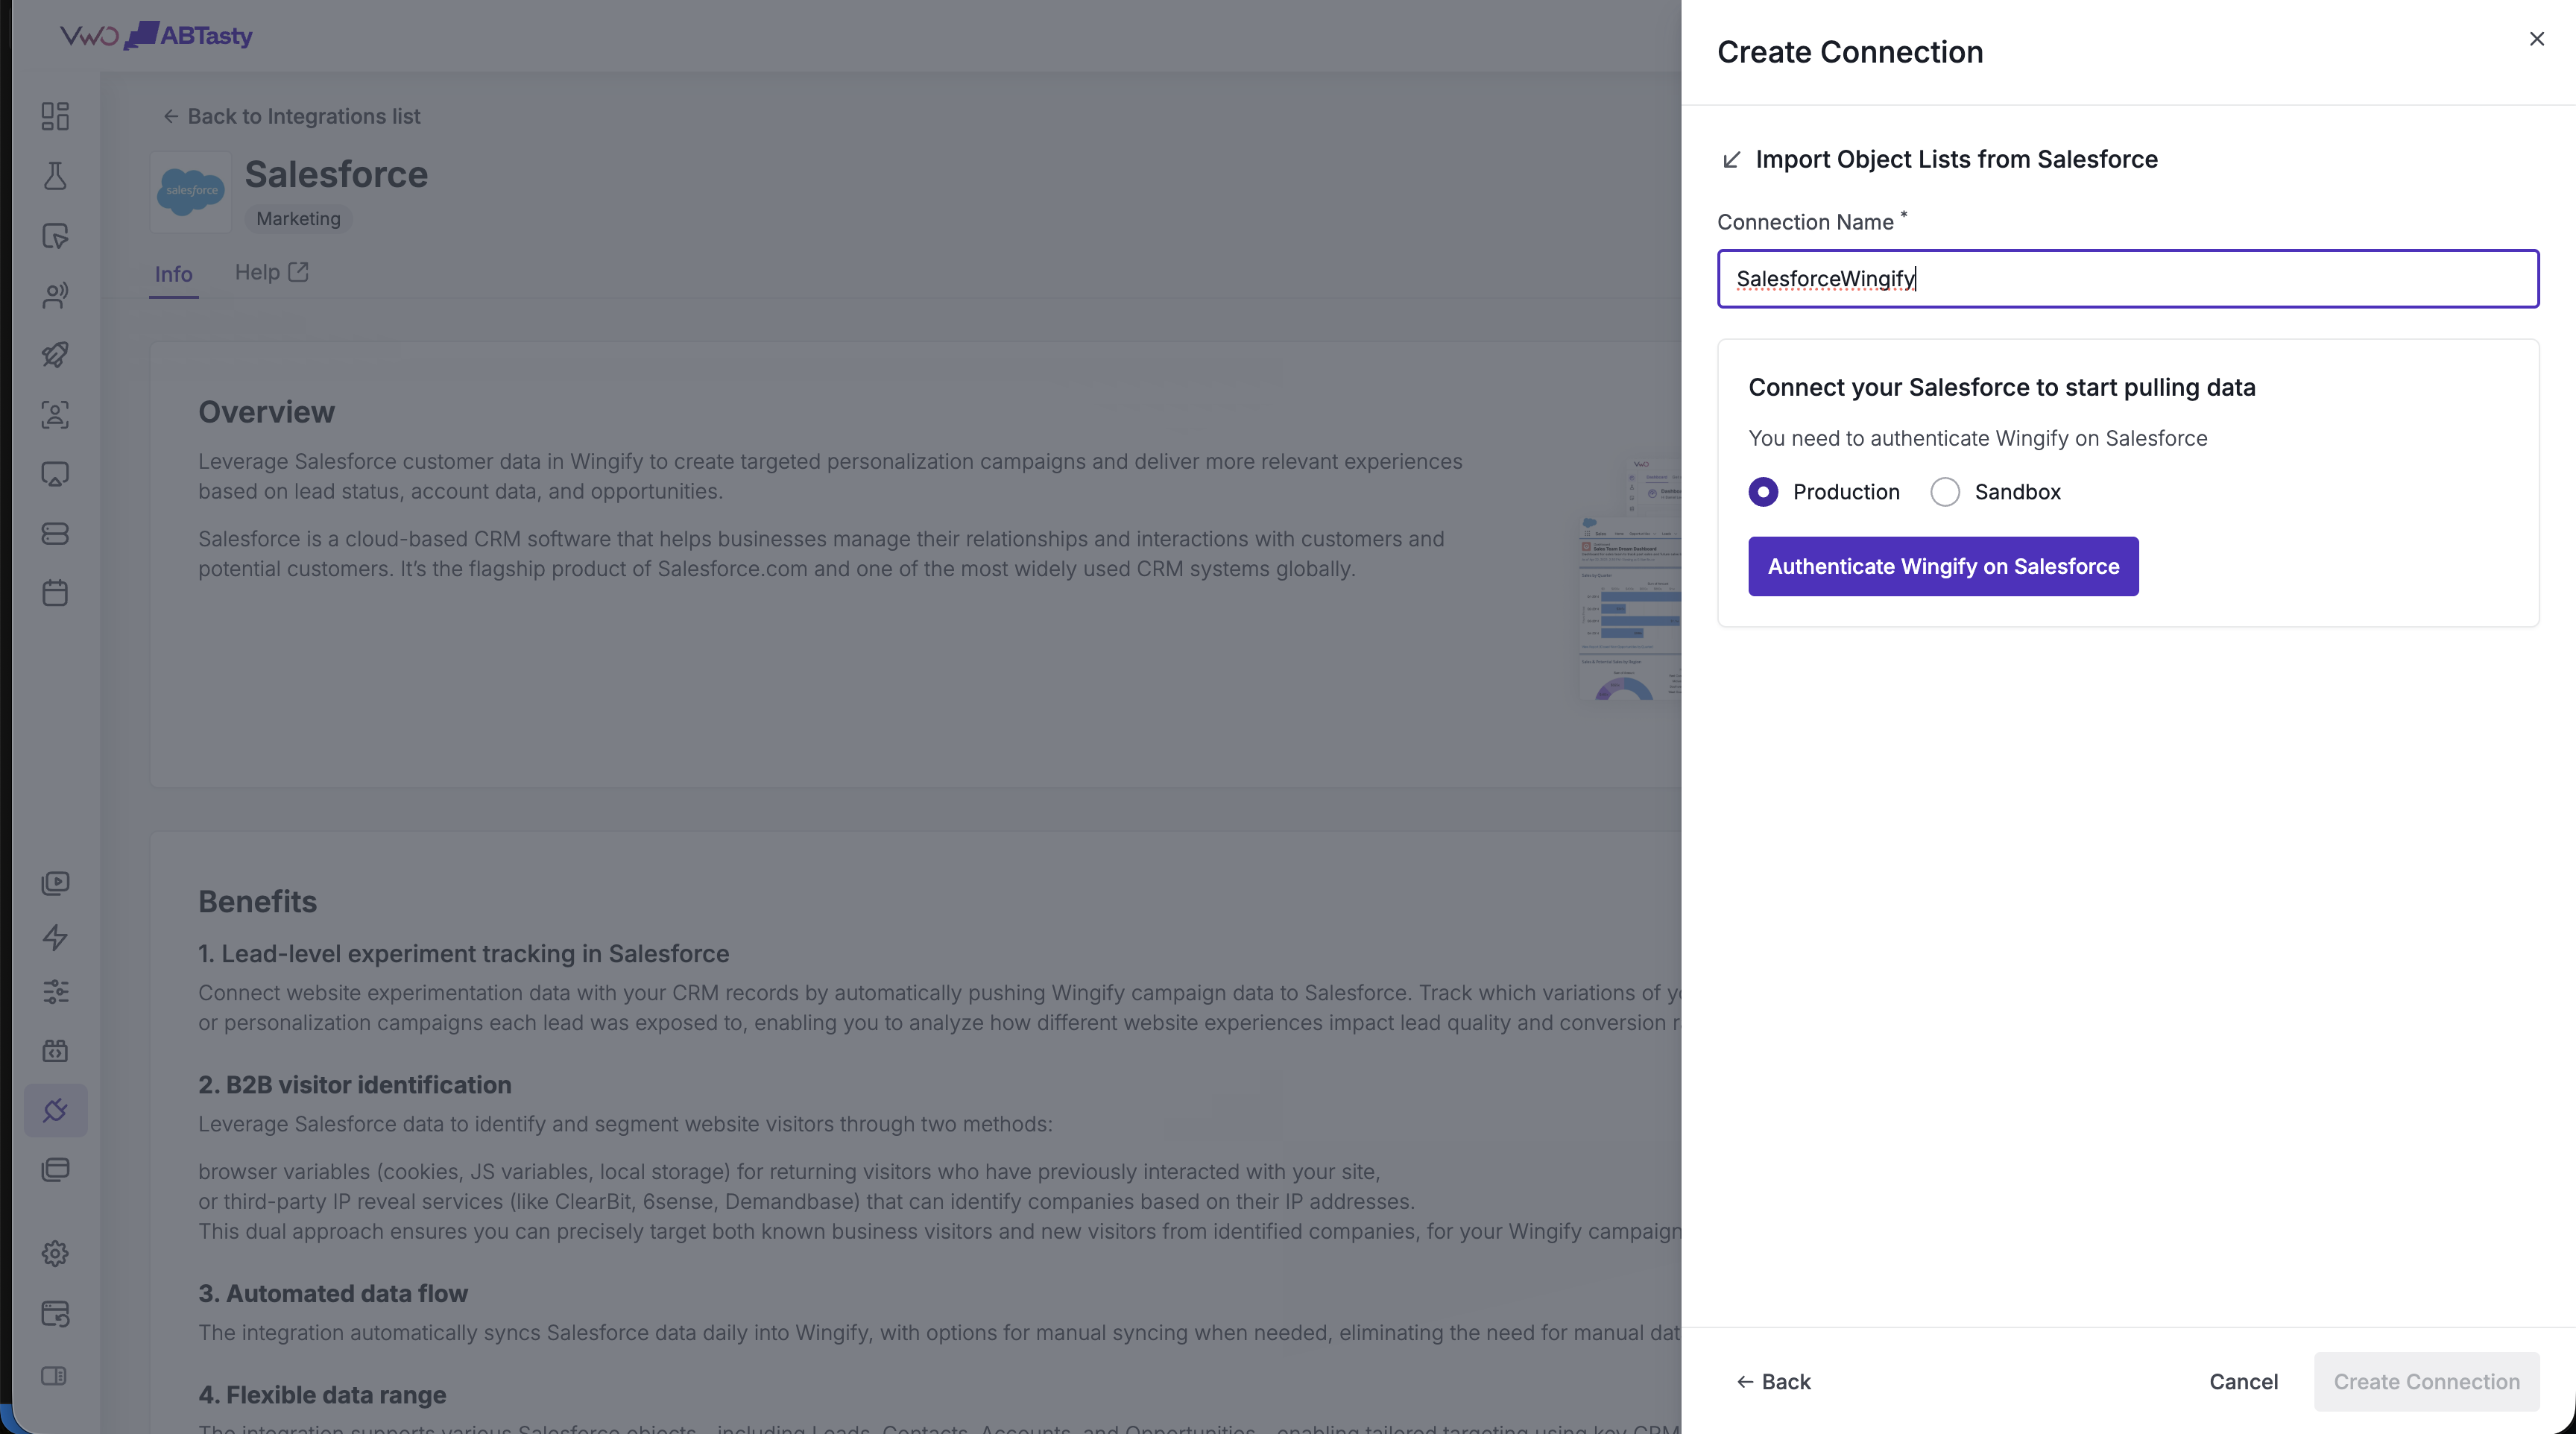
On the Salesforce integration page, click create connection, then enter connection name, now click on the Authenticate Wingify on Salesforce button.
-
In the authentication popup, enter your Salesforce account credentials to log in.
-
Upon successful login, your Salesforce account is connected to Wingify. This allows Wingify to access your account to import object lists.
Step 3: Import Salesforce Object Lists to Wingify:
-
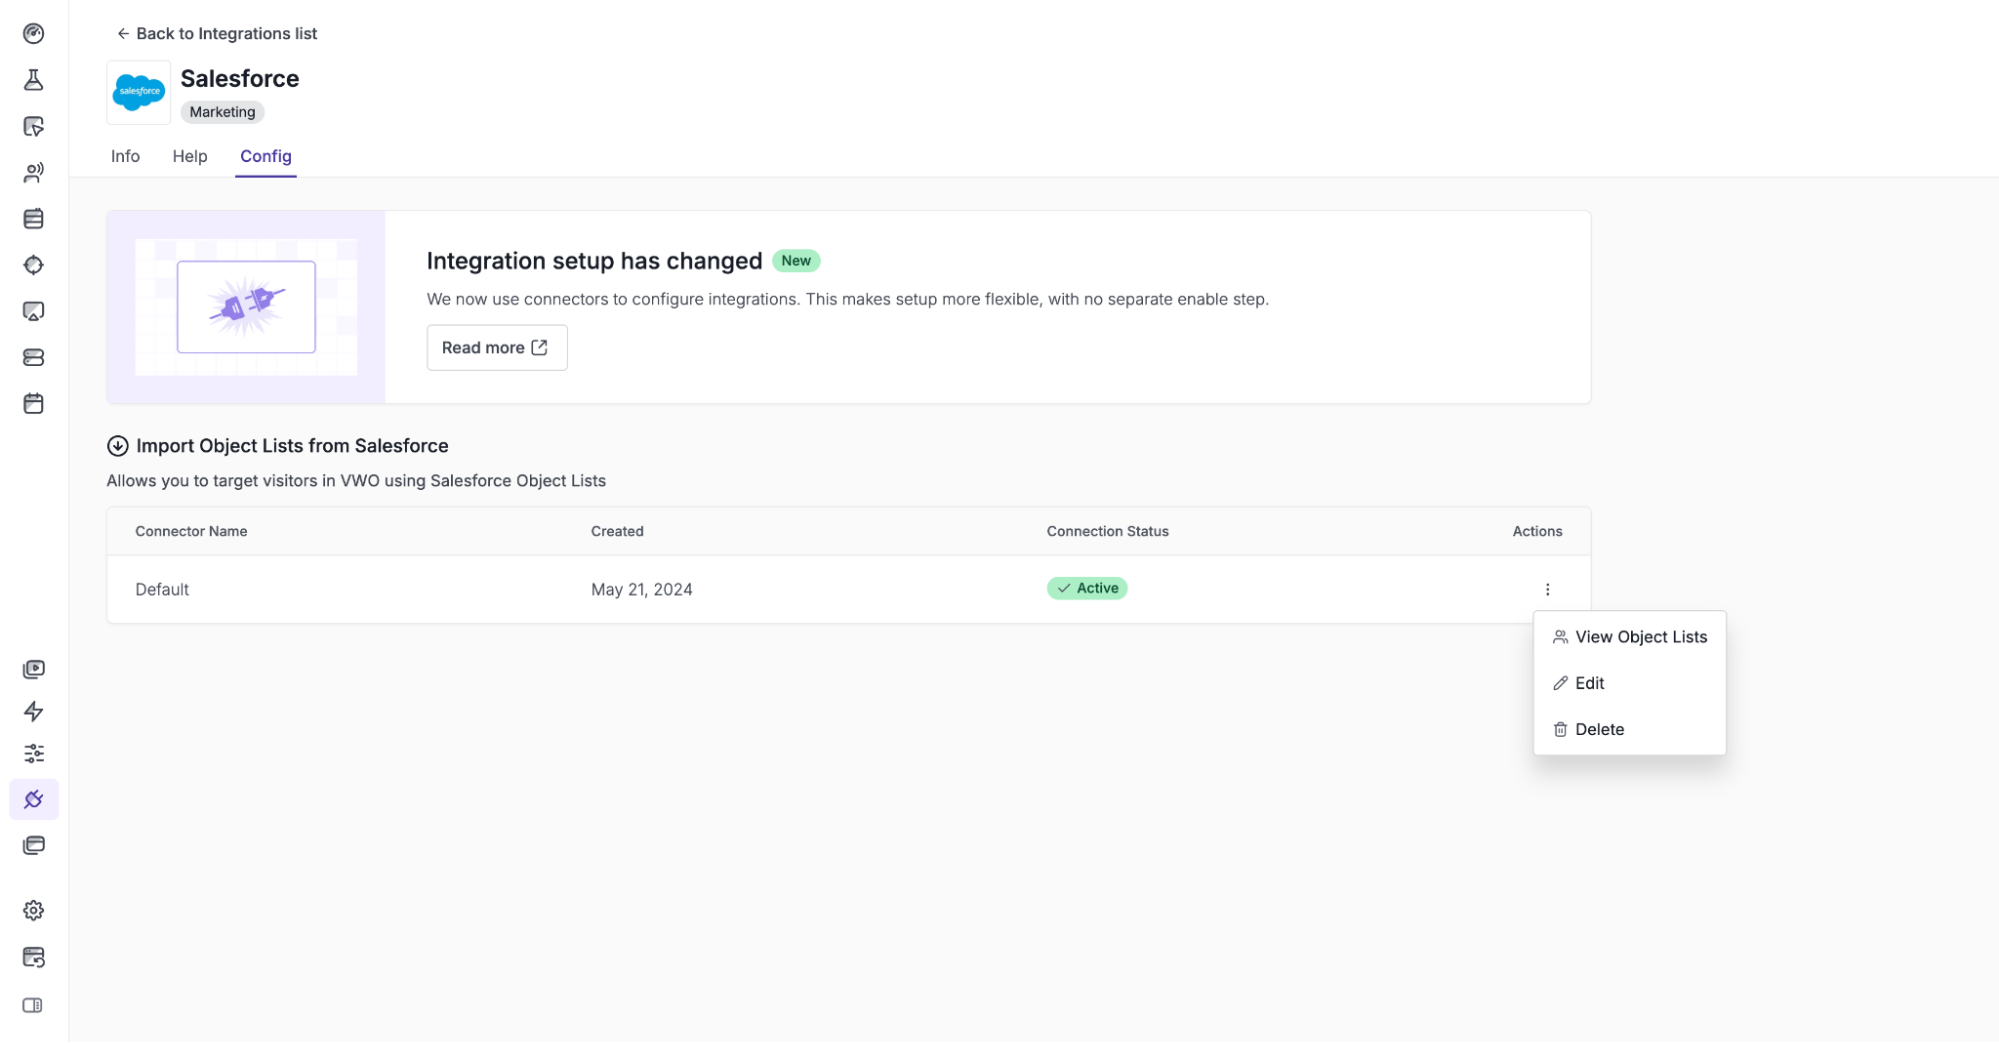
In Wingify, under the Salesforce Config tab, click on the Ellipse under the Actions column, then click on View Object Lists.
-
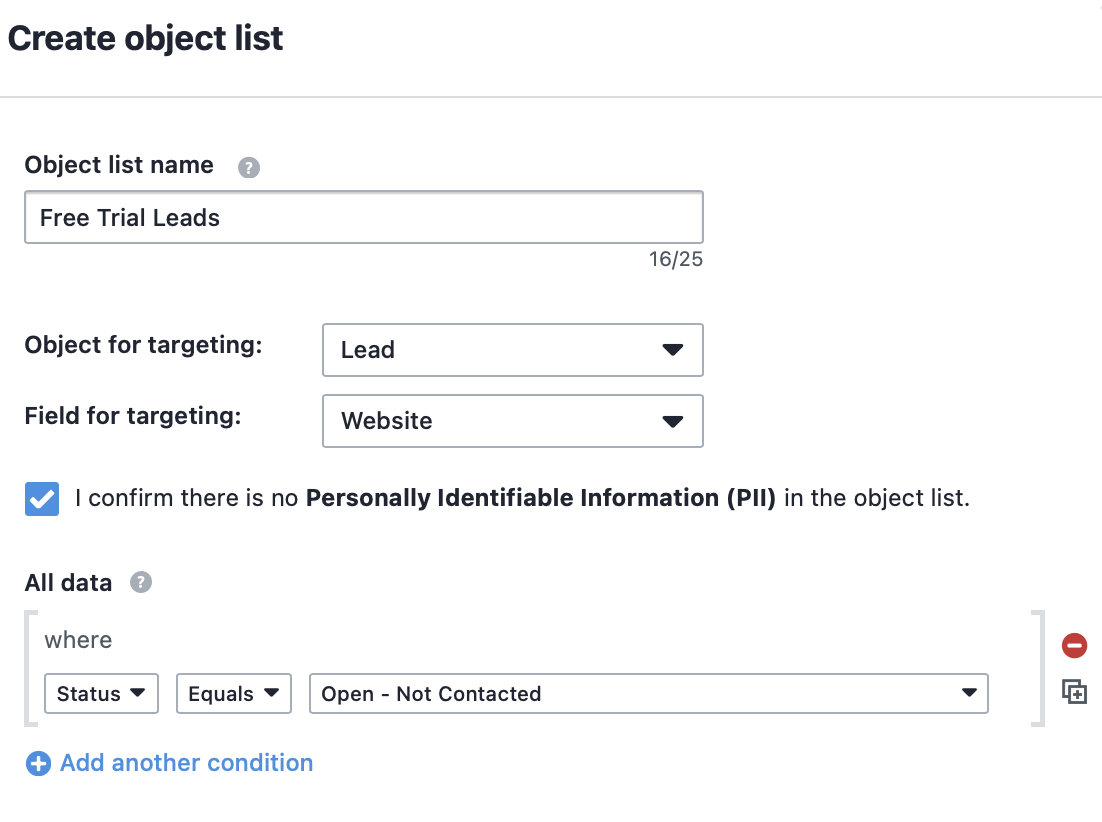
In the Create object list pane, perform the following:
- Object list name: Provide a descriptive name for your list.
- Object for targeting: Select the relevant Salesforce object type (e.g., Lead, Account, or Opportunity).
- Field selection: Choose the specific field that contains the unique data you wish to target (e.g., Website, Email).
- Add Conditions (Optional): Click Add condition to filter the data (e.g., "Lead Status = Qualified").
-
Click Test Data to preview the matches.
-
Once verified, click Submit. Wingify will start fetching your list.
Step 4: Activate Salesforce Lists in Wingify:
- The data sync starts immediately. You can track progress in the Salesforce integration page.
- Wingify runs an automatic sync once daily.
- If you make updates in Salesforce and need them reflected immediately, click Sync all or select Sync from the vertical ellipsis next to a specific list.
Note: The import of Salesforce object lists is subject to your Attribute list quota.
Step 5: SDK Setup (Node.js Example)
Install and Initialize the Wingify SDK
Install the official Wingify FE Node SDK:
npm install wingify-fme-node-sdkSetup Gateway Service
The gatewayService is mandatory for Salesforce integration because the SDK uses the Gateway to check in real-time if the user belongs to the synced Salesforce segment stored in Wingify.
Reference: Wingify Gateway Service Doc
Step 6: Setting Up Pre-Segmentation for Salesforce-Synced Segments
Once your Salesforce lists are imported into Wingify, configure pre-segmentation in your feature flag.
-
Navigate to Feature Experimentation → Feature Flags in Wingify.
-
Click Create Feature Flag (or open an existing one).
-
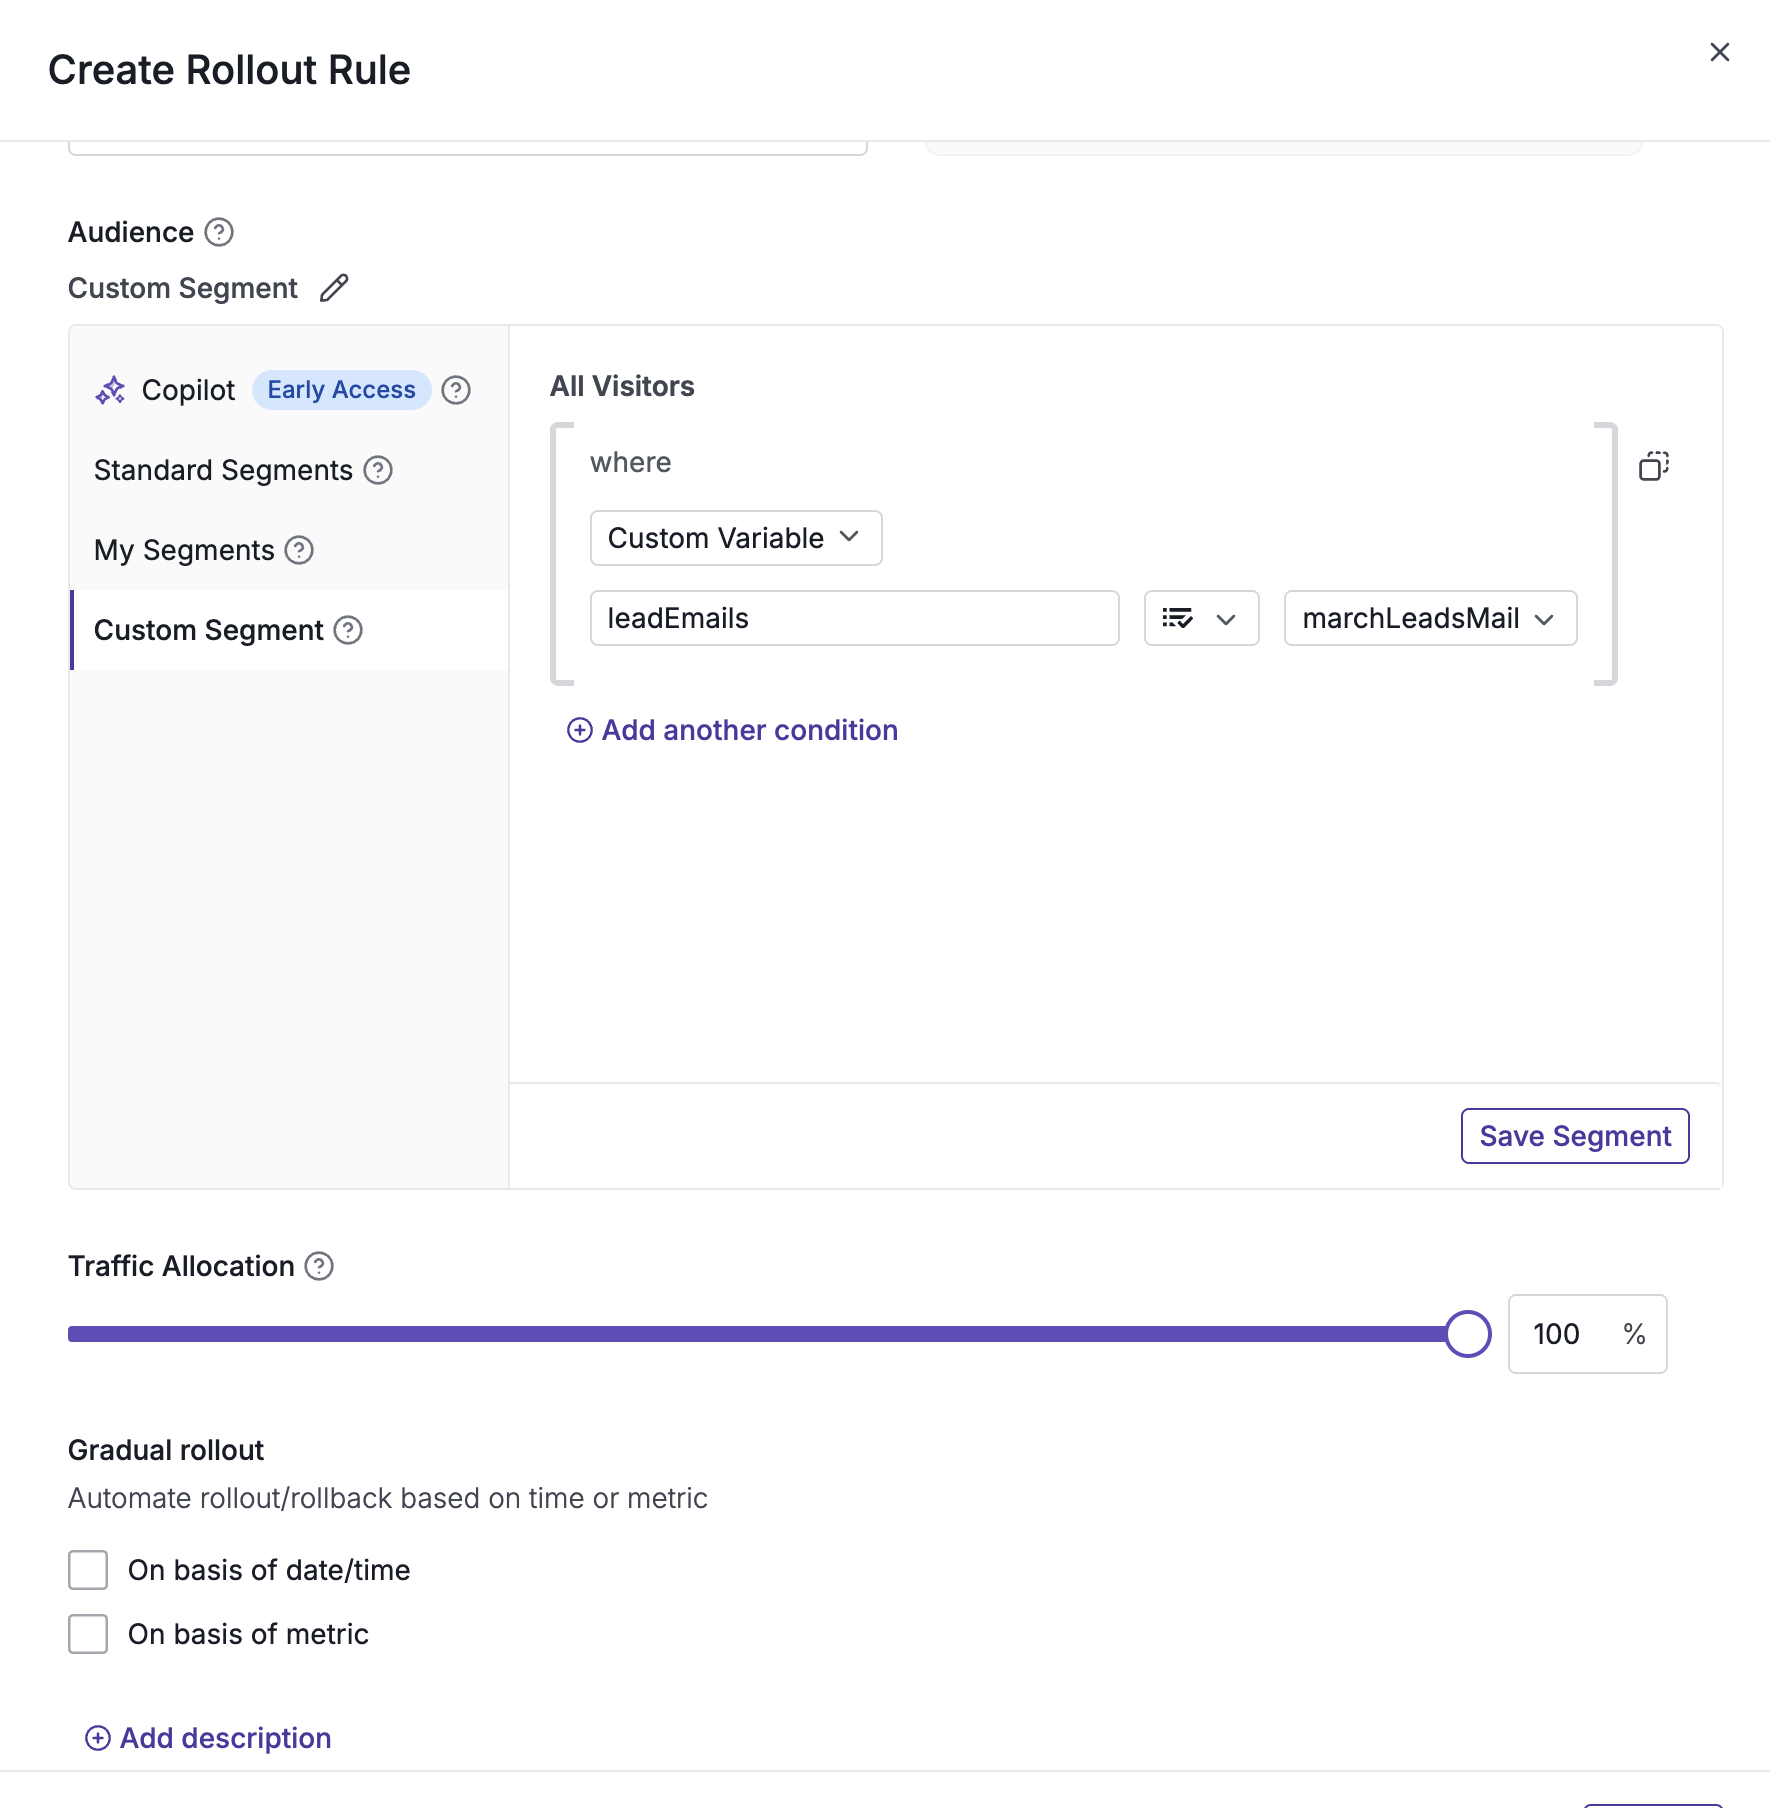
Go to the Rules tab → Click Create New Rollout Rule.
-
Under Audience, choose Custom Segment.
-
In Attribute, select Custom Variable.
-
Enter the identifier name used for targeting (e.g.,
salesforce_idorleadEmails). -
Choose Operator → In List.
-
Select the Attribute List corresponding to your Salesforce object list.
-
Save the rule and toggle ON the rollout rule.
Step 7: Implementing Salesforce Segment Targeting in SDK
Ensure your SDK passes the appropriate user context. The key in customVariables must match the identifier you defined in the Wingify pre-segmentation rule.
let context = {
    id: 'user_12345',
    customVariables: {
        // This key must match the identifier defined in Wingify pre-segmentation
        "leadEmails": "[email protected]"
    }
};
const featureFlag = wingifyClient.getFlag('feature_flag_key', context);
if (featureFlag.isEnabled()) {
    console.log("Feature enabled for Salesforce-qualified user");
} else {
    console.log("User does not qualify based on Salesforce data");
}
Explanation
- The key (e.g., "leadEmails") must exactly match the identifier defined in your Wingify pre-segmentation rule.
- If the value exists in the imported Salesforce object list, the user qualifies.
- If not, the segmentation fails, and the rule remains disabled for that user.
Notes & Best Practices
- Identifier Matching: Ensure the field you import from Salesforce (e.g., Domain or Email) is the same value you pass into the SDK's
customVariables. - Daily Sync: Remember that Salesforce lists sync daily by default. Use manual sync for urgent updates.
- Data Privacy: Ensure the imported list adheres to data privacy regulations and does not contain PII unless necessary.
Updated 5 days ago