

Amplitude
Overview:
Amplitude is a powerful digital analytics platform that helps you understand user behavior across web and mobile. It automatically tracks user interactions and provides deep insights into customer journeys, retention, and engagement patterns.
What This Integration Achieves
This integration allows you to use Amplitude-identified users and cohorts for Wingify feature flag targeting. By importing user cohorts from Amplitude into Wingify, you can roll out or test features for specific segments (e.g. Power Users, Premium users, At-Risk users) and personalize product experiences based on actual user behavior tracked in Amplitude.
Key Benefits
- Segment-based targeting: Run feature experiments only for specific Amplitude cohorts
- Personalized rollouts: Deliver variations tailored to user properties (e.g., plan, region, engagement level, lifecycle stage)
- Cohort-driven A/B testing: Combine Amplitude's behavioral analytics with's experimentation engine
- Data-driven decisions: Leverage Amplitude's rich user behavior data for more effective feature rollouts
Step 1: Enabling the Amplitude Integration for Your Wingify Account
To enable the-Amplitude integration on your Wingify account, follow this:
-
Log in to your Wingify account.
-
From the left panel of your Wingify dashboard, go to Configurations > Integrations.
-
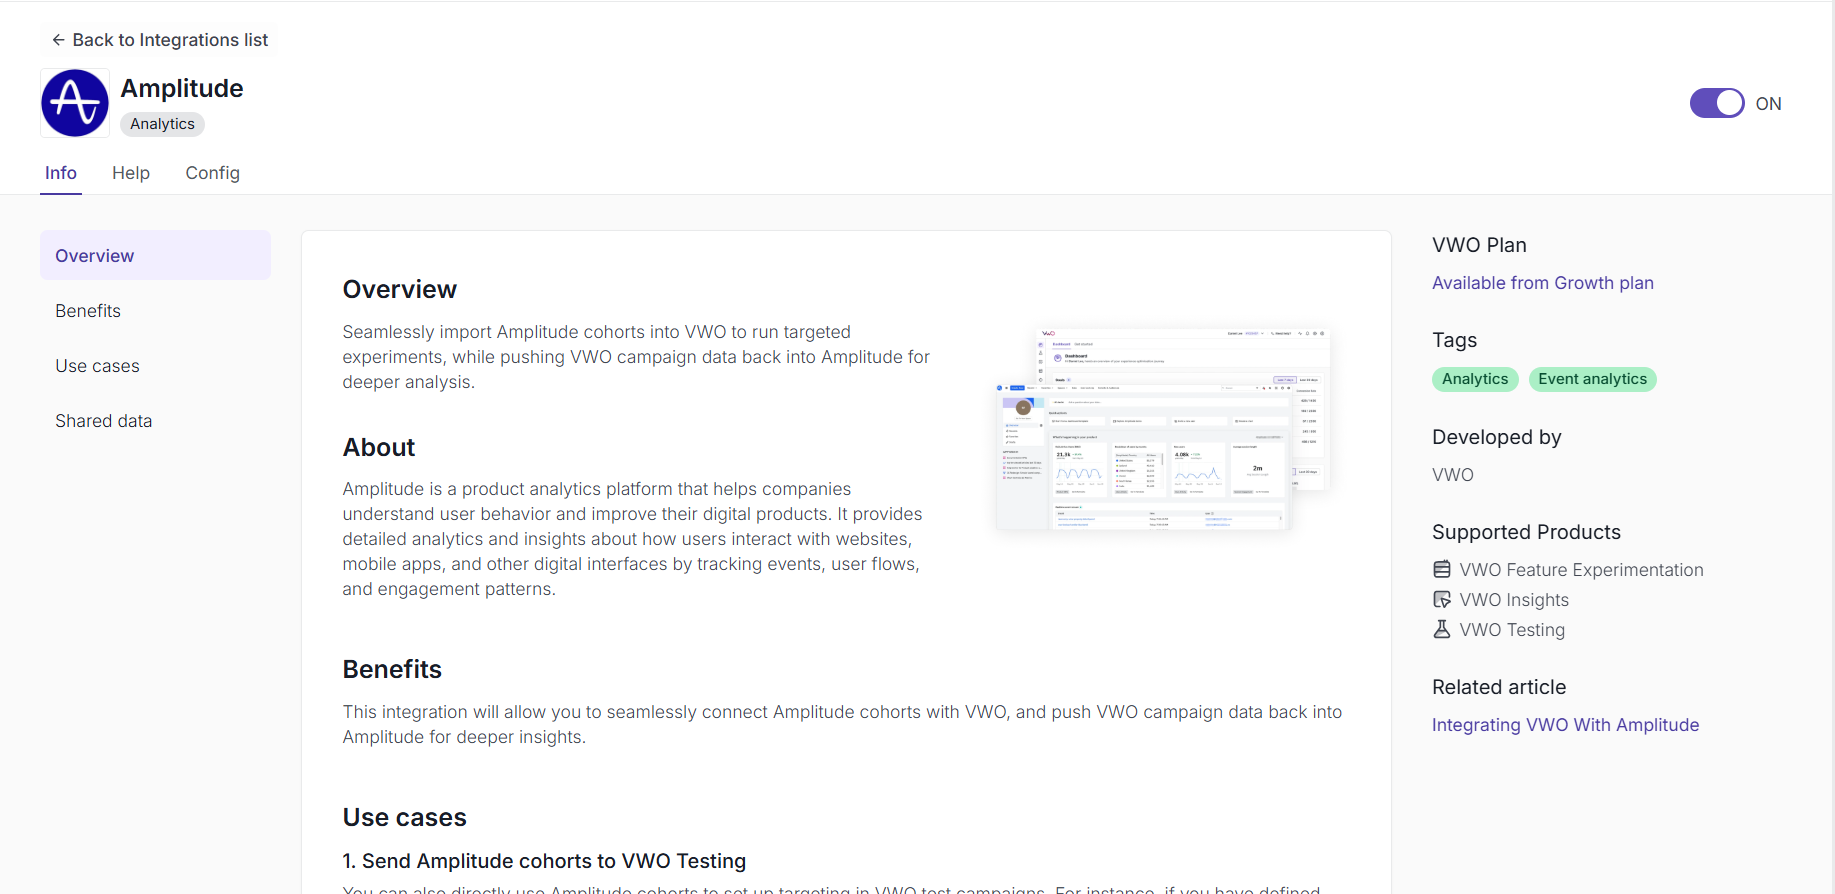
Click on the Amplitude integration and enable it. Once enabled, the Amplitude screen within the’s Integration section looks like this:
-
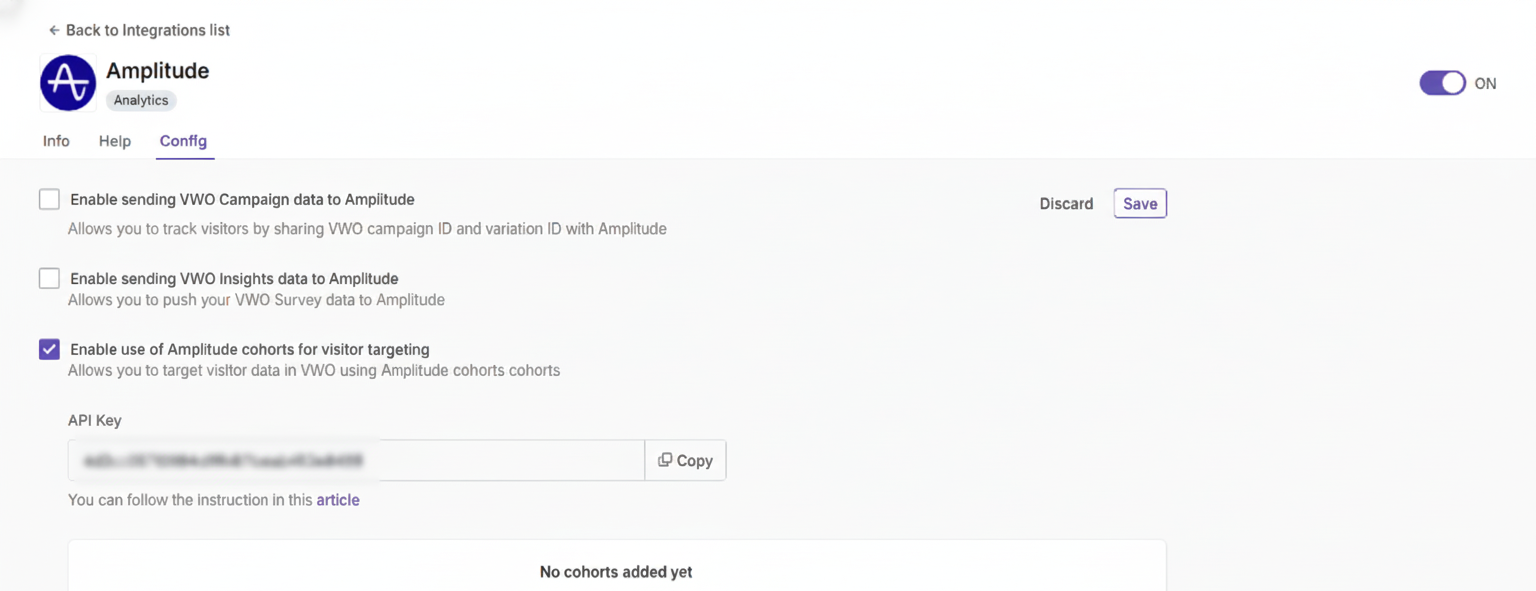
You will be auto-navigated to the Config tab.
5 .Enable "Enable use of Amplitude cohorts for visitor targeting".
-
Click Save.
-
Copy/note the API key that Wingify auto-generates. You'll need this to configure Amplitude.
Step 2 - Configure Wingify as a Destination in Amplitude
-
In Amplitude, navigate to Data > Catalog > Destinations >.
-
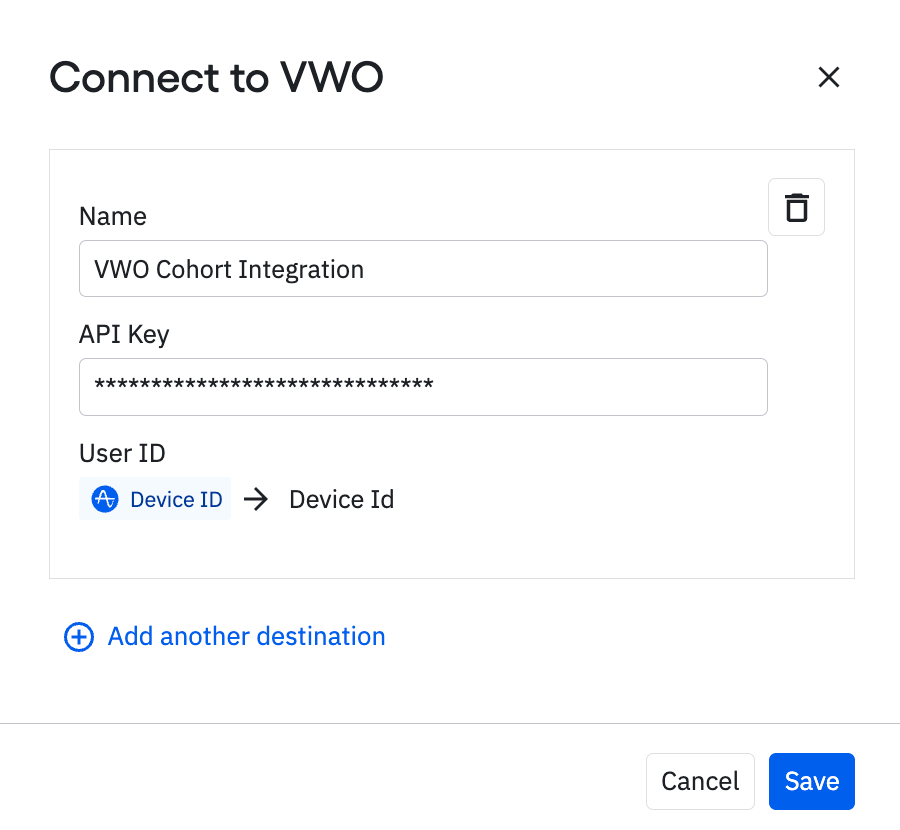
Click Add another destination.
-
Enter a name for the destination (e.g., “Wingify Production”).
-
Paste the API Key from the previous Wingify step.
-
For the User ID, select the property that best identifies your users (typically Amplitude's Device ID or User ID, as appropriate for your organization).
-
Click Save.
Step 3 - Sync Cohorts from Amplitude to Wingify
- In Amplitude, go to Users > Cohorts.
- Select an existing cohort or create a new one using Amplitude’s segmentation builder.
- Click Sync for the cohort.
- In the Select Destination popup, choose your Wingify destination.
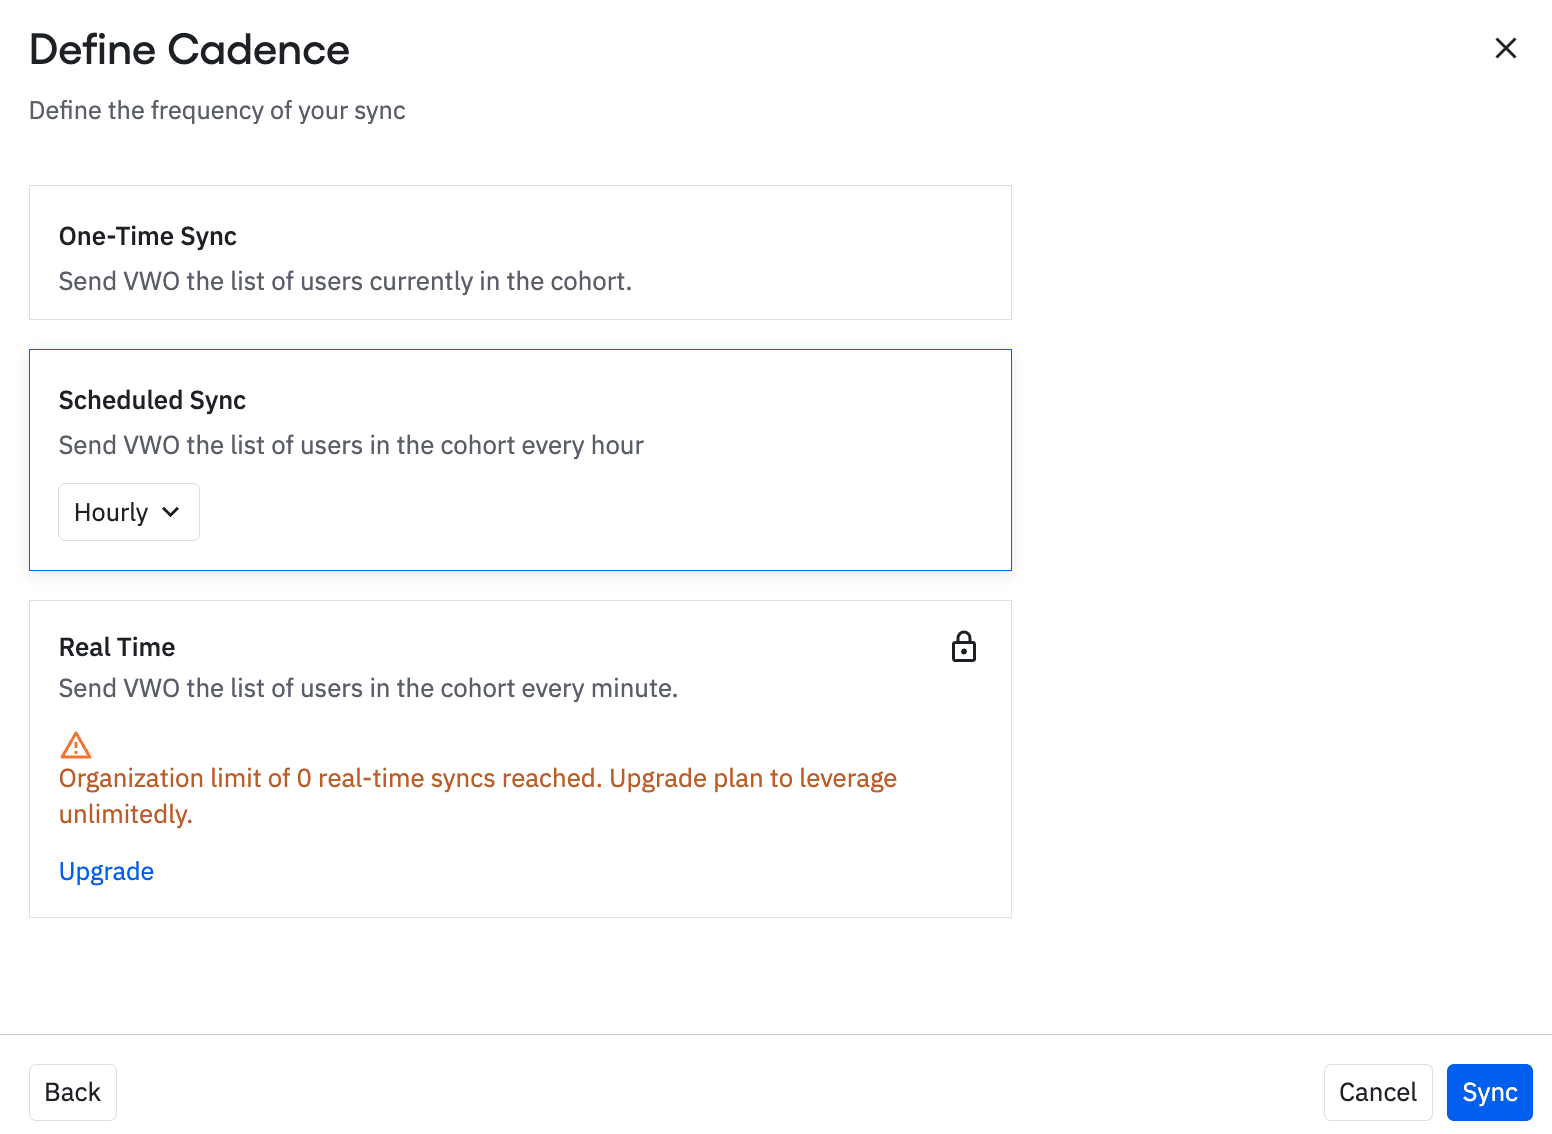
- Choose the sync frequency:
- Enable Scheduled Sync: Recommended (syncs automatically, keeps targeting up to date).
- One-Time Sync: Use if you do not want to keep syncing changes.
- Click Sync.
Step 4 - Import & Activate Amplitude Cohorts in Wingify
-
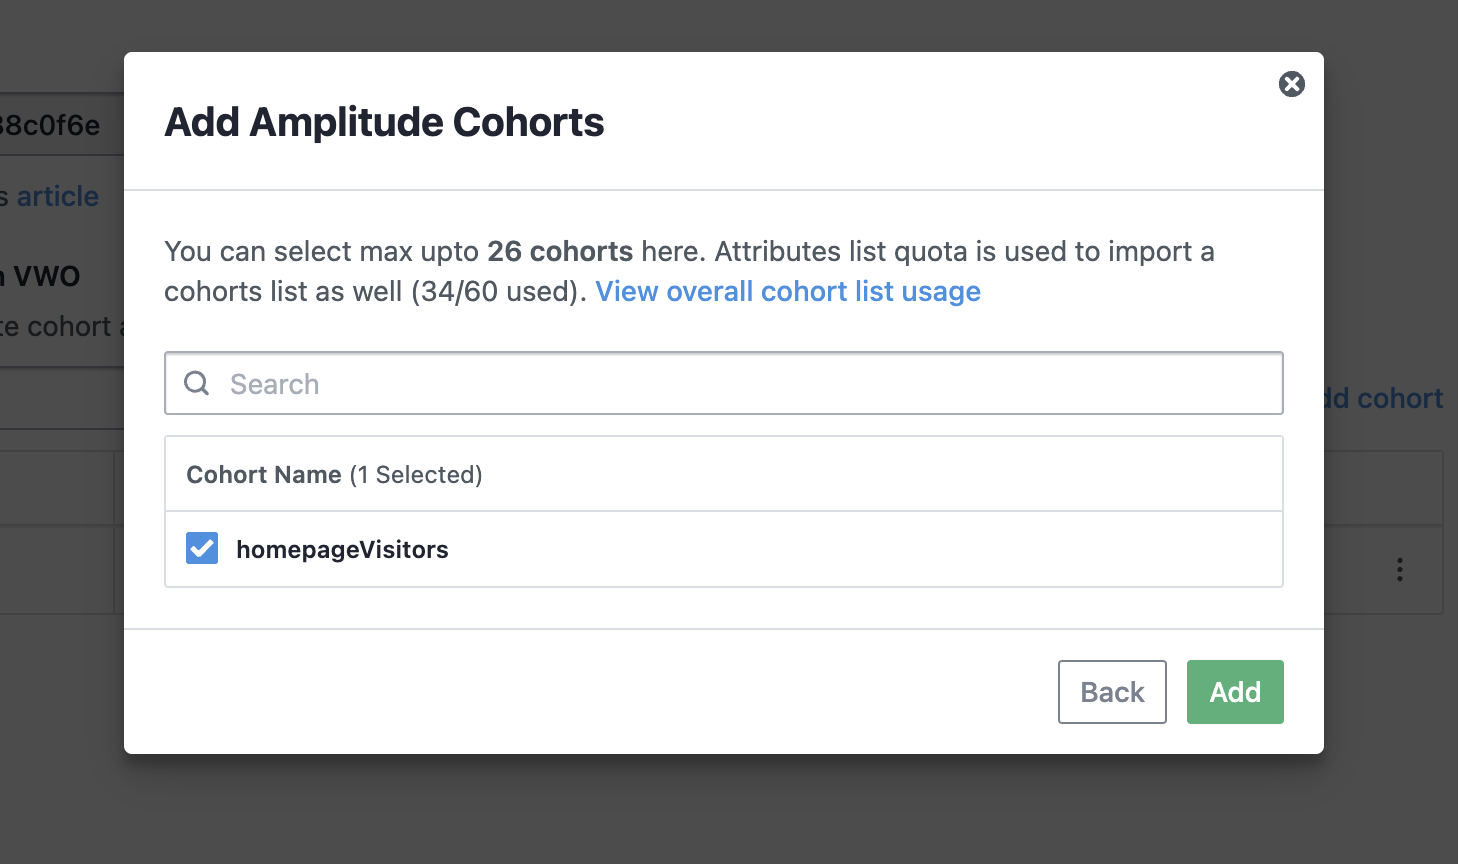
Back in Wingify, within the Amplitude integration settings, click Add Cohort.
-
Search for or select the Amplitude cohort(s) you just synced.
-
Click Add.
-
First sync may take up to 24 hours depending on the size of cohort. Subsequent syncs are automatic (every 24 hours by default), but you can also trigger manual sync.
Step 5 - SDK Setup (Node.js Example)
5.1 Install and Initialize the Wingify FM SDK
Install the official Wingify FM Node SDK:
npm install wingify-fme-node-sdk5.2 Setup Gateway Service :
Reference: Wingify Gateway Service Doc
5.3 Initialize the SDK in your application with gateway service:
Reference: SDK Initialization Doc
const wingify = require('wingify-fme-node-sdk');

const wingifyClient = await wingify.init({
    sdkKey: 'YOUR_SDK_KEY',
    accountId: 'YOUR_ACCOUNT_ID',
    gatewayService: {
        url: 'YOUR_GATEWAY_SERVICE_URL'
    }
});
Note: The gatewayService is mandatory for Amplitude integration because the SDK itself does not store your Amplitude cohort data. When you evaluate a flag, the SDK uses the Gateway to check in real-time if the user belongs to the synced Amplitude segment.
Step 6: Setting Up Pre-Segmentation for Amplitude-Synced Segments
Once your Amplitude segments are imported into, configure pre-segmentation in your feature flag to target those users.
Configure Pre-Segmentation in the Feature Flag
-
Navigate to Feature Management → Feature Flags in Wingify.
-
Click Create Feature Flag (or open an existing one).
-
Add variables and variations as per your use case.
Example:
- Variable Name: Your_Variable_Name
- Type: Datatype
- Default Value: “Default value”
-
Choose a primary metric to measure conversions or engagement.
-
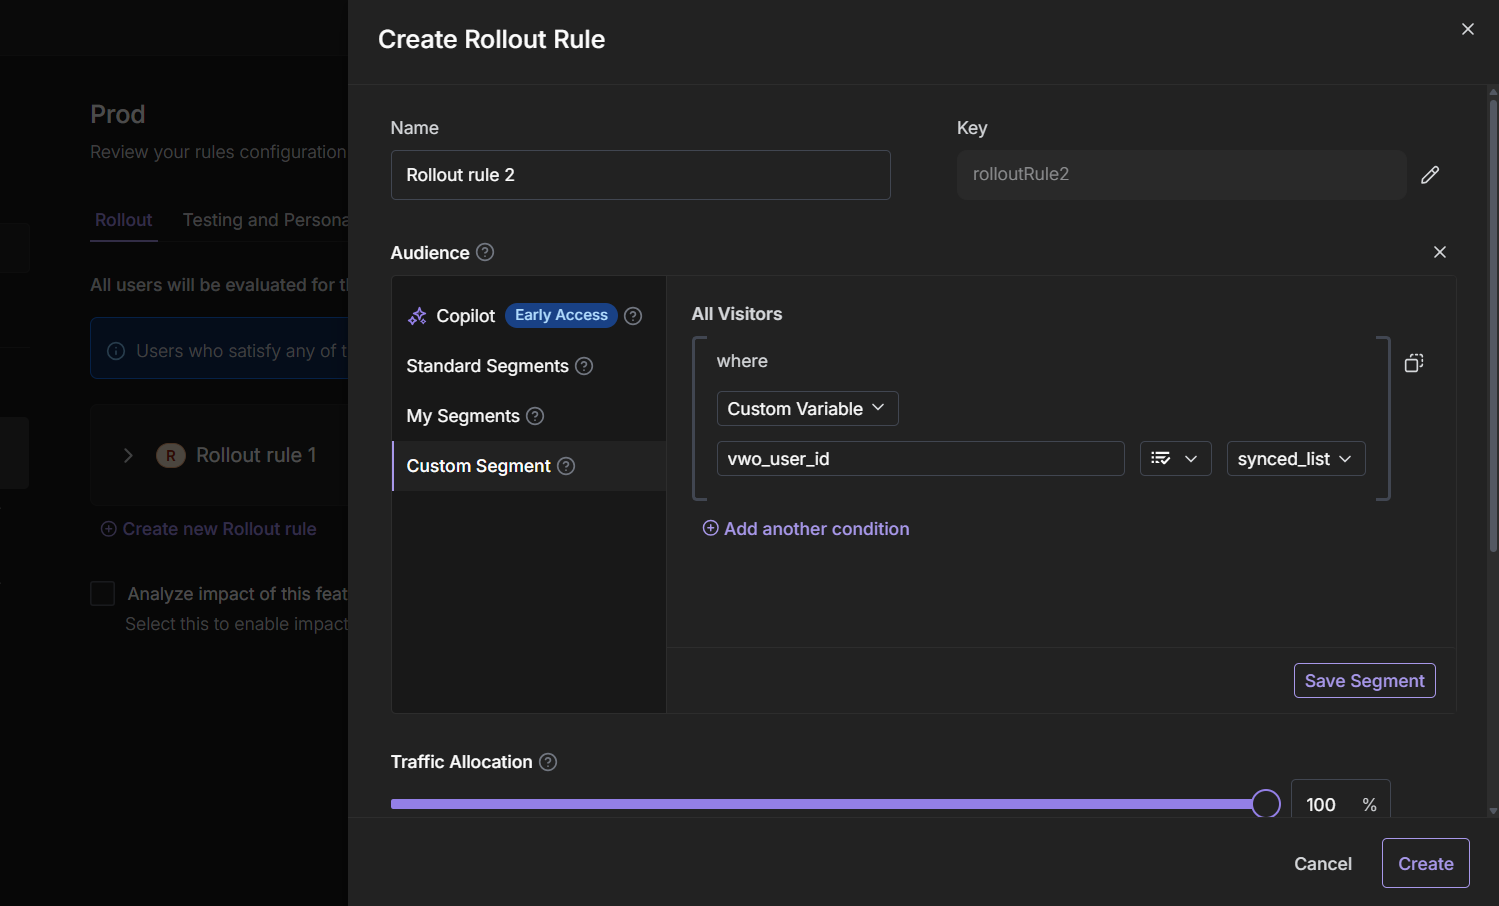
Go to the Rules tab → Click Create New Rollout Rule.
-
Under Audience, choose Custom Segment.
-
In Attribute, select Custom Variable.
-
Enter the identifier name used for targeting.
-
Choose Operator → In List.
-
Select the Attribute List corresponding to your Amplitude segment (e.g., amplitude_premium_users).
-
Save the rule and toggle ON the rollout rule.
Finally, copy the SDK Key — you’ll need it for SDK initialization.
Step 7: Implementing Amplitude Segment Targeting in SDK
After configuring pre-segmentation in the Wingify app, ensure your SDK passes the appropriate user context for evaluation. Let’s see an example of using Amplitude Segments in feature evaluation.
Once the SDK is installed, do the following
- Add the Amplitude user identifier inside customVariables while creating the user context.
- Pass this context to getFlag() so Wingify can evaluate the feature flag using Amplitude cohort pre-segmentation.
let context = {
    id: 'UserID',
    customVariables: {
        "your_variable_name": "value_for_variable"
    },
    ipAddress: 'user_ip_Address',
    userAgent: 'Mozilla/5.0 (Windows NT 10.0; Win64; x64) AppleWebKit/537.36 (KHTML, like Gecko) Chrome/130.0.0.0 Safari/537.36'


};

const featureFlag = wingifyClient.getFlag('featureFlag', context);

if (featureFlag.enabled) {
    console.log("Feature enabled for Amplitude-segmented user");
} else {
    console.log("User does not qualify for the Amplitude segment rollout");
}
Explanation
-
The key "your_custom_variable" must exactly match the identifier defined in your Wingify pre-segmentation rule.
-
If the value Identifier exists in the imported Amplitude list, the segmentation passes and the user qualifies.
-
If not, the segmentation fails and the rule remains disabled for that user.
Notes & Best Practices
-
Ensure the custom variable key in your SDK context matches the one defined in Wingify’s rule configuration.
-
If you have multiple Amplitude Cohorts, create separate rollout rules for each to maintain clear targeting logic.
Wingify Always use recurring sync to keep segment data updated between Amplitude and
Updated 7 days ago