Streaming Events From GTM to Wingify
Wingify Event Streamer fetches events only from the GTM
dataLayervariable. It does not import events directly from Google Analytics (GA).
Wingify Event Streamer is a custom tag template that you can import into your GTM account in order to stream custom events from GTM to Wingify. This is an effortless approach if you just require fetching custom events from GTM to Wingify. You just need to install the Wingify streamer as a template on GTM and configure the events to be sent to Wingify from GTM.
Let’s say you have created tags in GTM for events such as “Add to Cart”, “Proceed to Checkout”, and “Purchase”, and you use these events in your Google Analytics account. Now, you’re looking to import the same events as metrics into Wingify to run a campaign for gauging the sellability of a certain product. Don’t worry, you needn’t get into extensive integration here. You can simply install the Wingify Event Streamer and add it as a custom template to your GTM account. This streams all your custom events from GTM to Wingify just like that.
If you require more capabilities, such as transferring campaign data from Wingify to GTM targeting visitors in your Wingify campaigns using a GTM datalayer variable, you need to integrate your Wingify account with GTM .
NOTE: The Wingify Event Streamer setup is exclusively applicable to Data360 accounts.
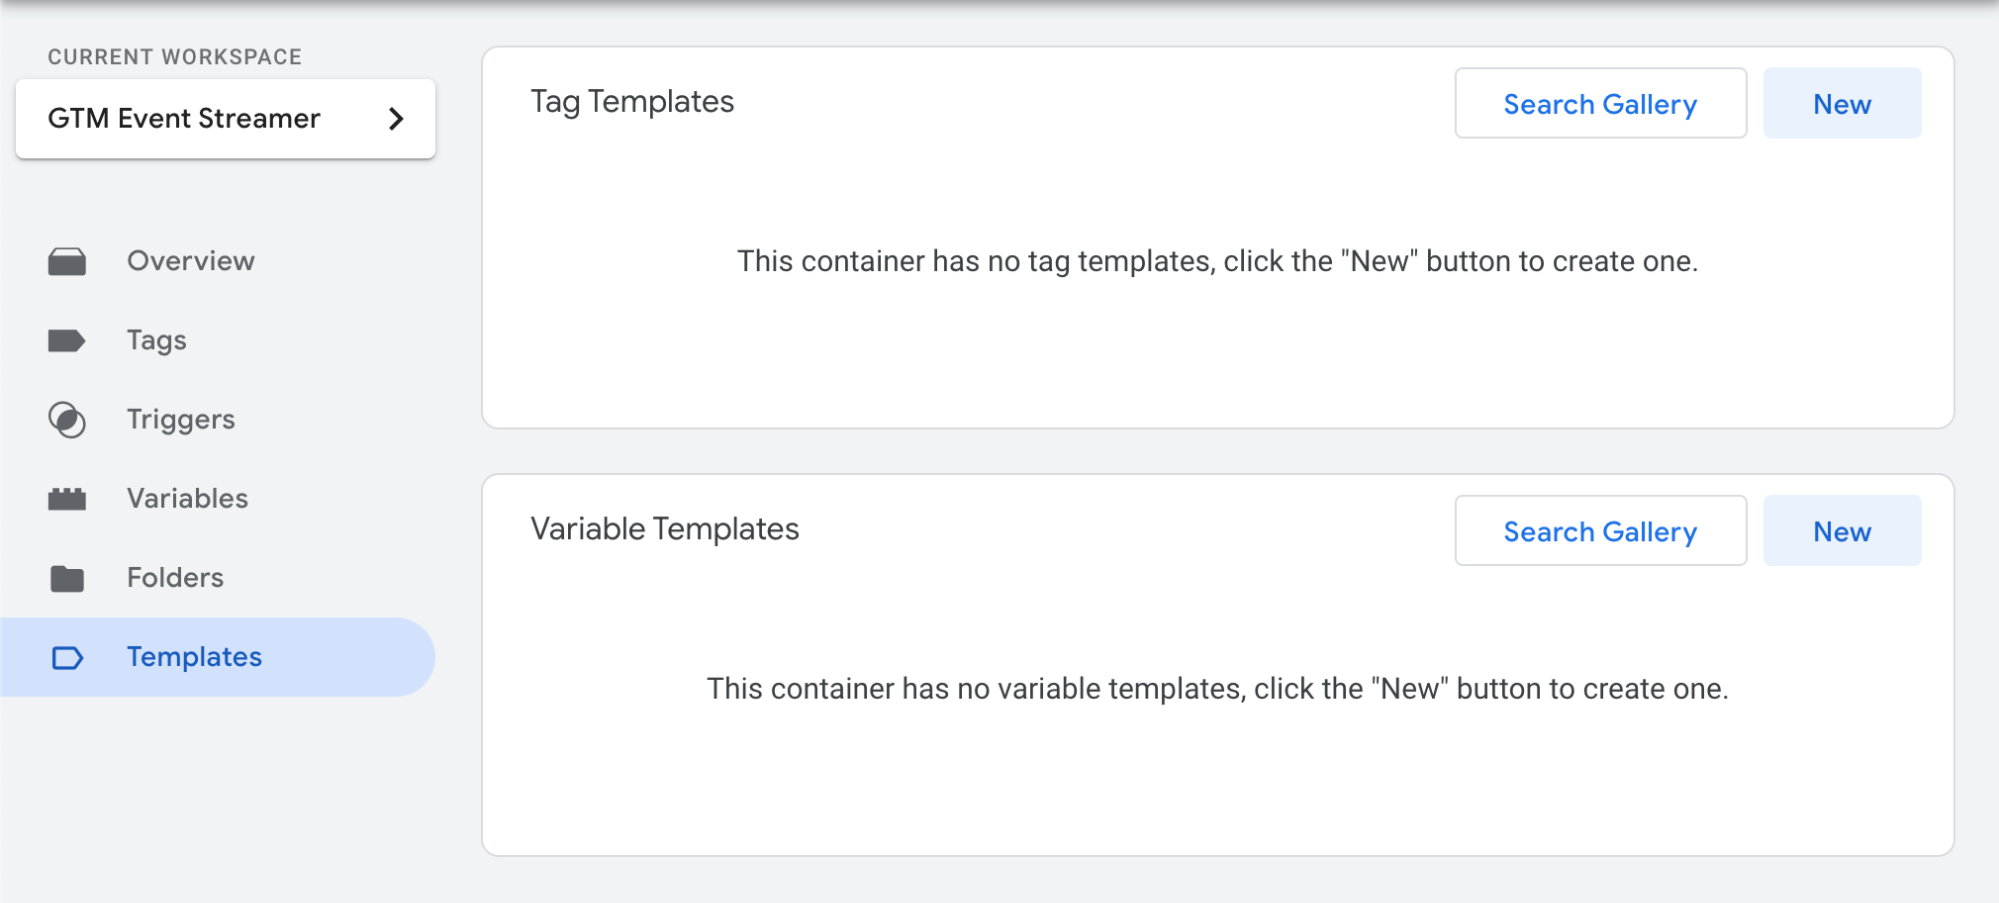
Installing Wingify Event Streamer on GTM
Download the Wingify Event Streamer tag template from here , extract the files and perform the following steps to install the Wingify Event Streamer on GTM:
-
Log in to your GTM account and select the appropriate workspace where you want to install the Wingify Event Streamer.
-
From the main menu on the left, go to Templates > Tag Templates > New.
-
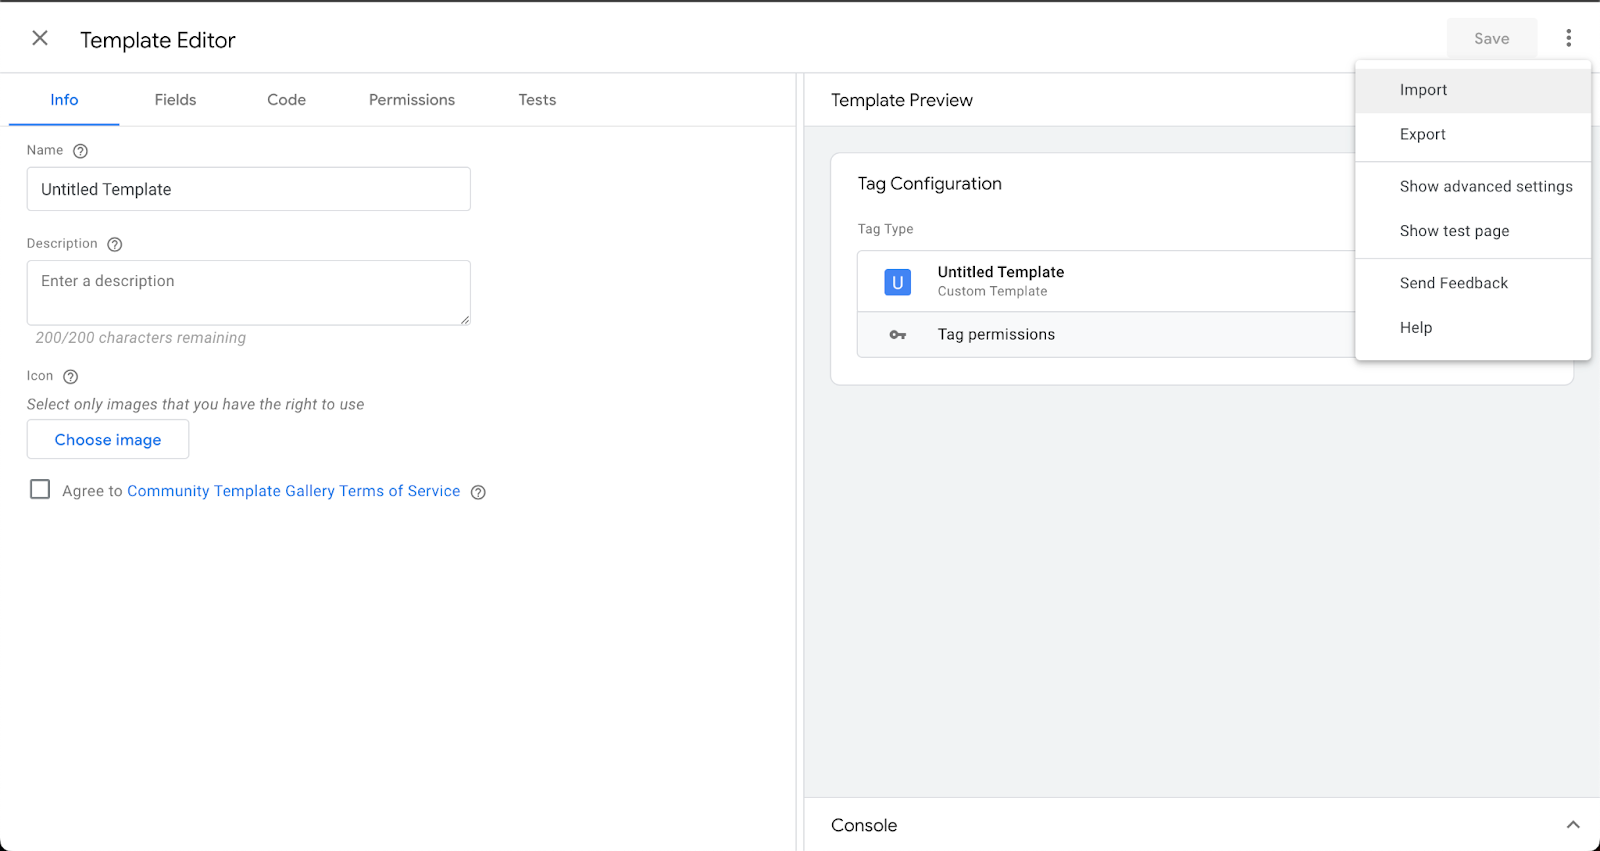
On the Template Editor page, click on the vertical ellipsis (⋮) and select Import.
-
Unzip the VWO_Event_Streamer.zip and select the template.tpl file.
-
Click Save to complete the import of the Wingify Event Streamer template.
Using the Wingify Event Streamer Template
Upon successful import, you can use the Wingify Event Streamer template to stream the events from GTM to Wingify effortlessly. To do that, perform the following steps:
-
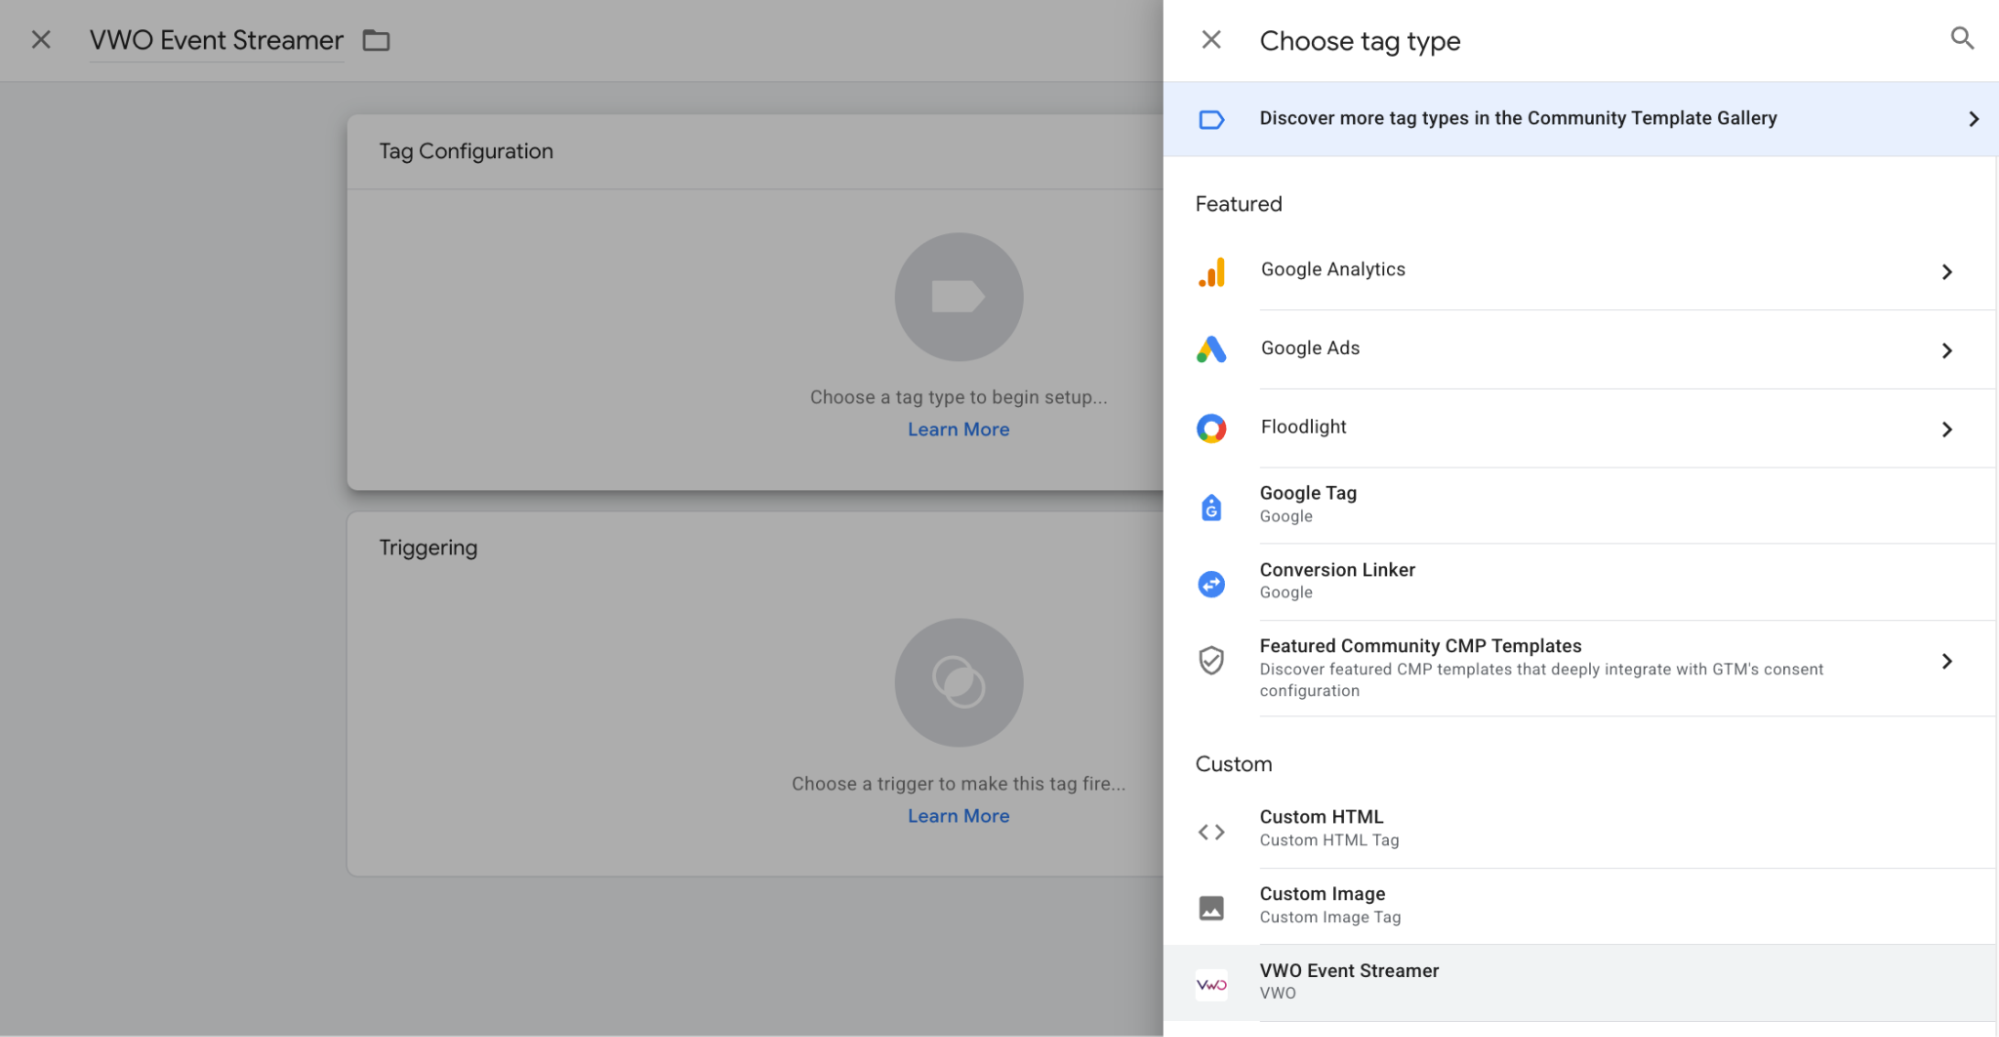
From the main menu on your GTM dashboard, navigate to Tags > New.
-
Name the tag and click on the Tag Configuration section.
-
From the list of tags, under the Custom section, select the Wingify Streamer tag.
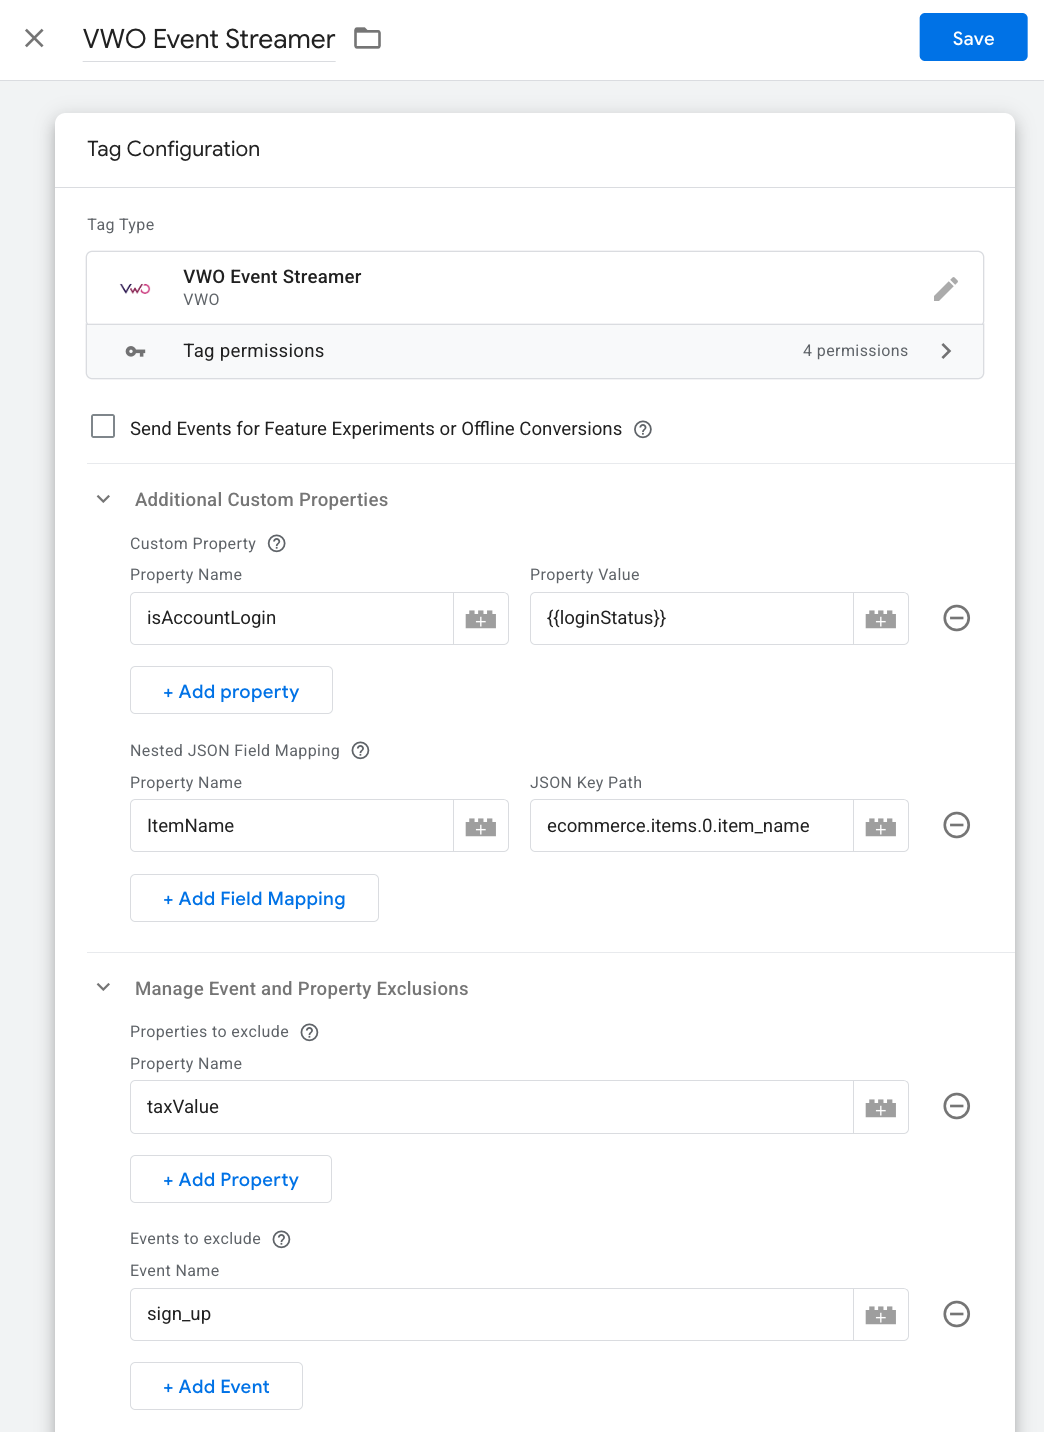
Configure the Wingify Template Settings:
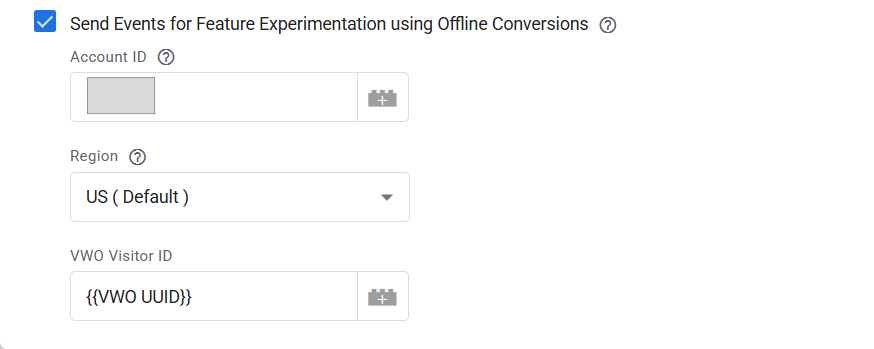
Send Events for Feature Experimentation using Offline Conversions (Optional)
Enables sending events for Feature experimentation (FE) using Offline Conversions. When this option is checked, the GTM tag sends the events to Wingify as Offline Conversions.
- Account ID: Your Wingify Account ID
- Region: Region, US (default)
- Wingify Visitor ID: User’s UUID
Additional Custom Properties
1. Custom Property: Allows you to add custom properties that will be sent with every event. To add a custom property, click on Add New Property and enter the input in the respective fields as follows:
- Property Name: The name of the custom property.
- Property Value: The value of the custom property.
2. Nested JSON Field Mapping: Allows you to import event properties with JSON nested values into Wingify. To do this, click on Add Nested Field Mapping and enter the input in the respective fields as follows:
-
Property Name: The name of the property you want to map.
-
JSON Key Path: The path to the key in the JSON object.
Example JSON:
{ "event": "purchase", "ecommerce": { "transaction_id": "123", "value": 55, "currency": "USD", "items": [ { "item_id": "SKU_12345", "item_name": "Vintage Chair" }, { "item_id": "SKU_67890", "item_name": "Antique Lamp" } ] } } -
For a value inside a nested object, such as "value": 55 inside ecommerce, the JSON Key Path to use is: ecommerce.value
-
For a value inside an array, such as the name of the first purchased item ("Vintage Chair"), the JSON Key Path to use is: ecommerce.items.0.item_name
You can add as many property mappings as needed by clicking + Add Field Mapping.
Manage Event and Property Exclusions:
Use this section to block specific data from being sent to Wingify
-
Properties to exclude: Specify the names of the events to exclude if necessary (e.g.,taxValue).
-
Events to exclude: Add rows for event names you do not want to track (e.g.,sign_up).
Triggering
-
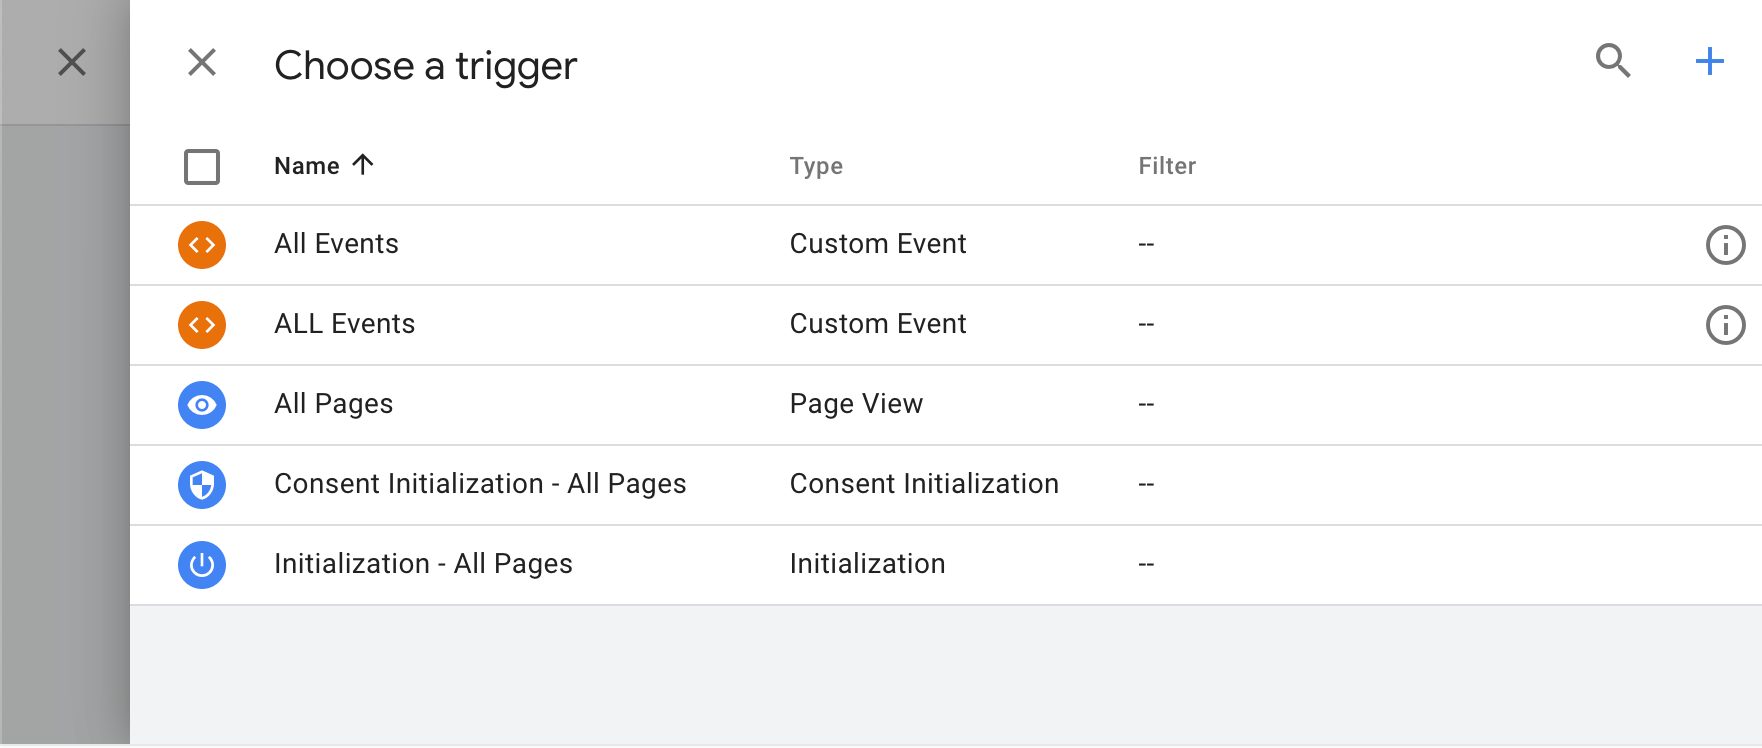
Click on the Triggering section and click on the + icon at the top-right to create a new trigger.
-
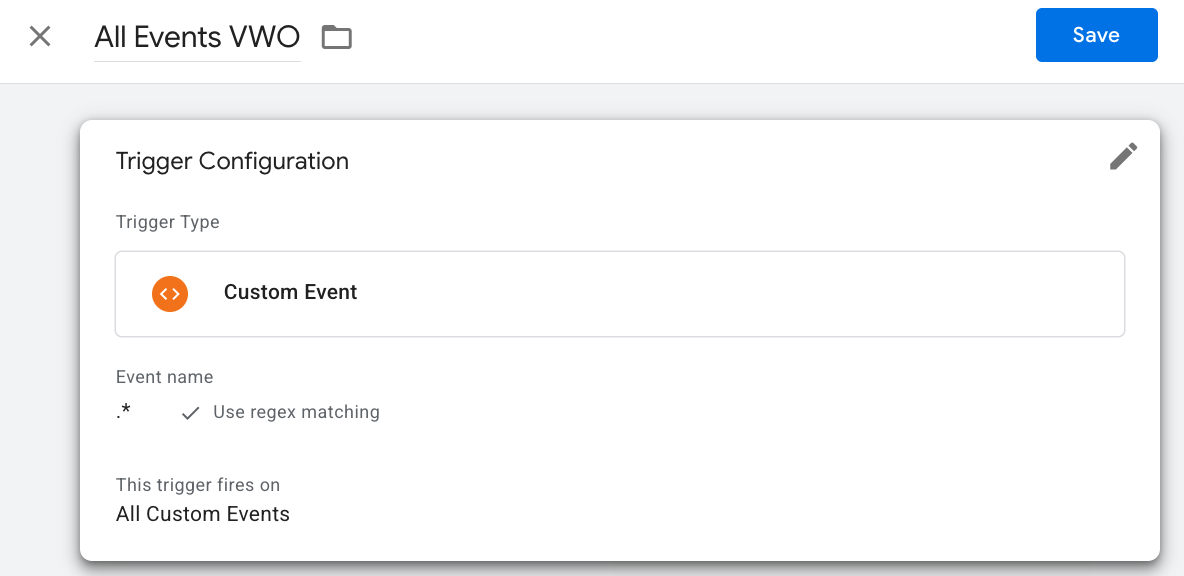
Name the trigger and click on the Trigger Configuration section.
-
We recommend using the following trigger settings to stream all the events to Wingify. Configure your trigger settings as follows and click on Save:
-
In the Trigger Type field, select Custom Event.
-
In the Event name field, enter “.*”.
-
Select the Use regex matching option.
-
Click Save.
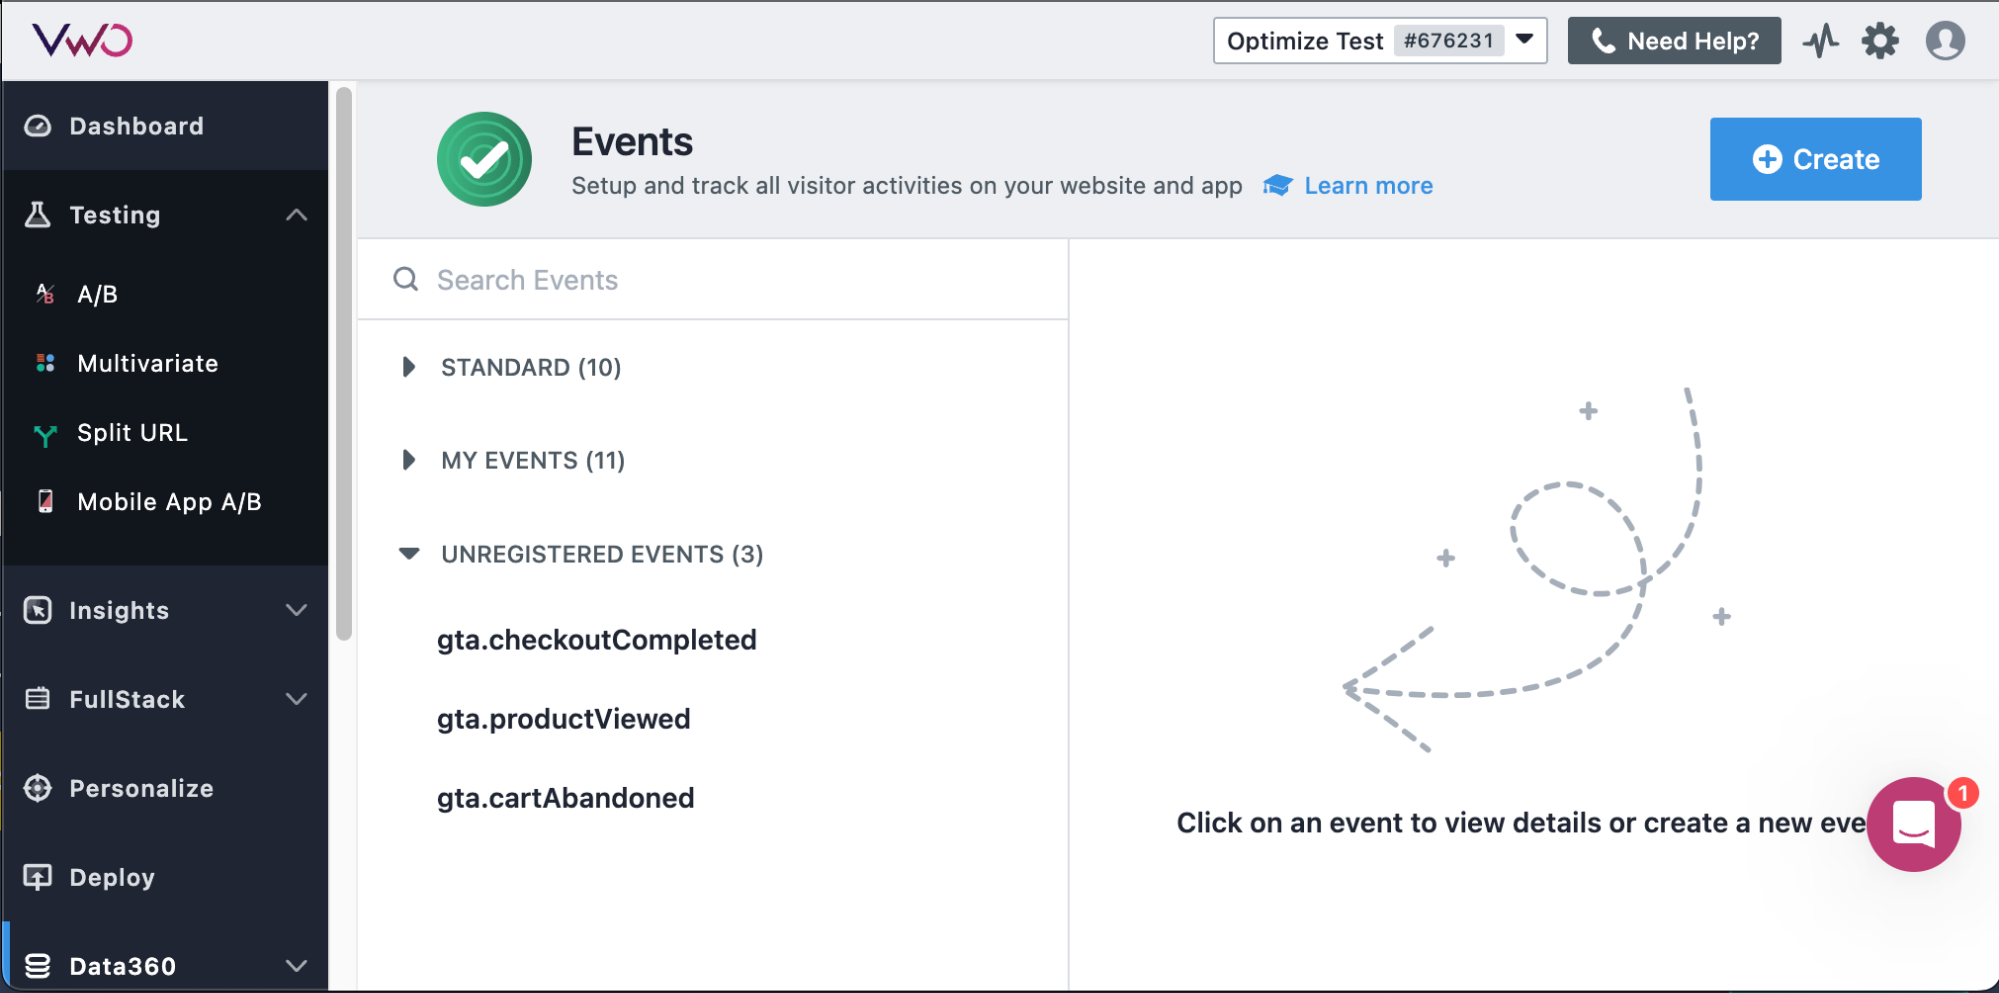
Now, your website events from GTM will be streaming into the UNREGISTERED EVENTS section under Events in your Wingify Data360 module. You can use these events to set up your campaign triggers , create metrics , and target the visitors for your campaigns .
-
Configuring the Wingify UUID Variable (Only required for FE)
-
Navigate to the “Variables” tab in the GTM workspace.
-
Click on “New” to create a new variable.
-
Name your variable as Wingify UUID.
-
In the Variable Configuration section:
- Choose “1st Party Cookie” as the Variable Type.
- Enter _vwo_uuid in the Cookie Name field.
-
Save the variable.
NOTE: To enable GTM event tracking, the
_vwo_uuidcookie must be accessible in the browser. Use the Wingify SDK’sgetUUID()method to generate this identifier based on your implementation: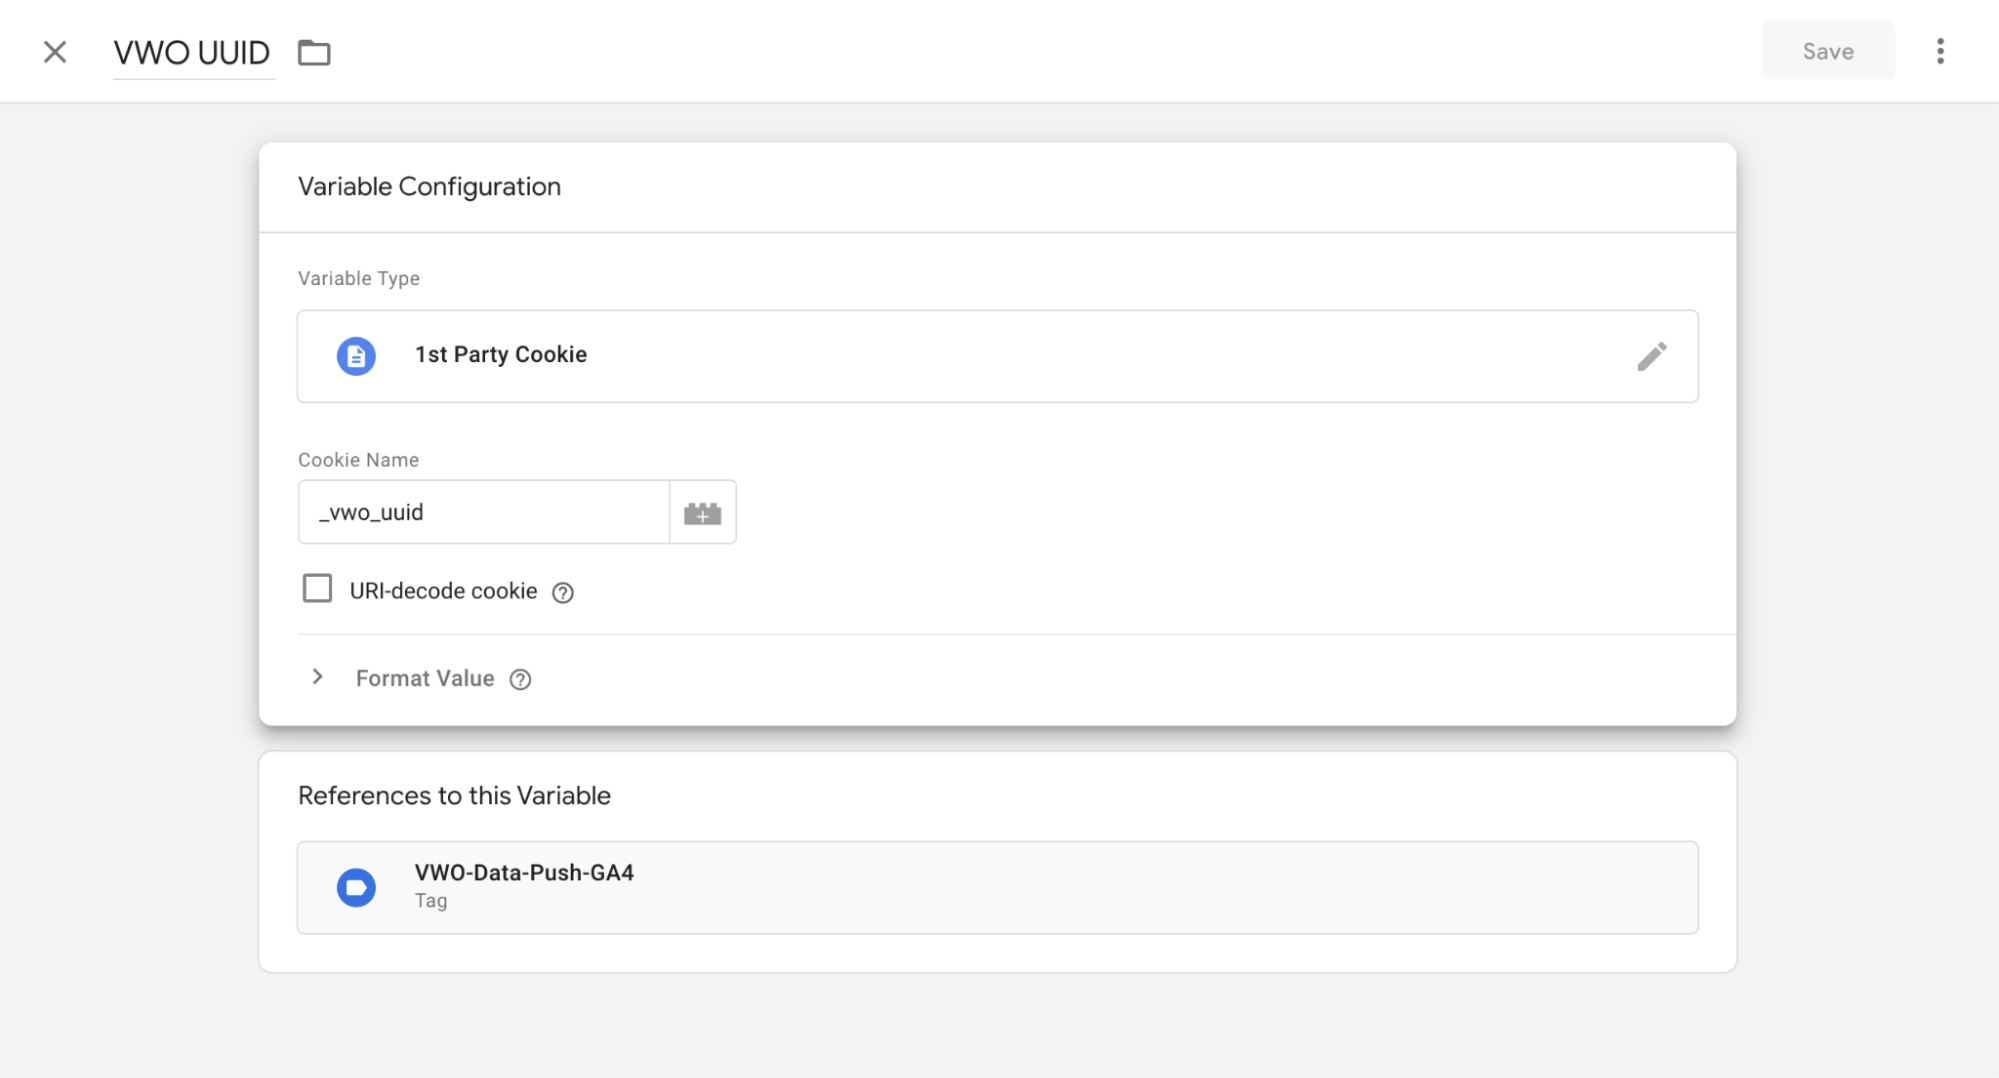
Backend SDK (Server-Side)
- Generate: Call
getUUID(userId, accountId)in your SDK (e.g., Node.js). - Pass: Send the generated UUID from your server to the frontend.
- Set: Store the value in the browser as the
_vwo_uuidcookie. Ensure the cookie is notHttpOnlyso GTM can access it.
Frontend SDK (Client-Side)
- Generate: Call
getUUID()directly within your client-side SDK. - Set: Store the returned string in the browser using
document.cookiewith the name_vwo_uuid.
Supported Event Formats
The Wingify Event Streamer only supports events that are directly pushed into the dataLayer or triggered through gtag. Therefore, ensure that your events are structured in one of these formats for them to be successfully imported into Wingify:
Pushing Events Directly into dataLayer
dataLayer.push({
  "event": "event_name"
});
Triggering Events Through gtag
gtag("event", "event_name");NOTE: GTM’s system events, like gtm.load, gtm.start, gtm.dom, etc., are not forwarded to Wingify.
Configuring Custom Datalayer Variable Name in Google Tag Manager
By default, GTM is set up to access events from your datalayer variable named 'dataLayer.' If you use a different datalayer variable name, follow these steps to specify your dataLayer variable name in GTM. This allows GTM to recognize and stream your events:
-
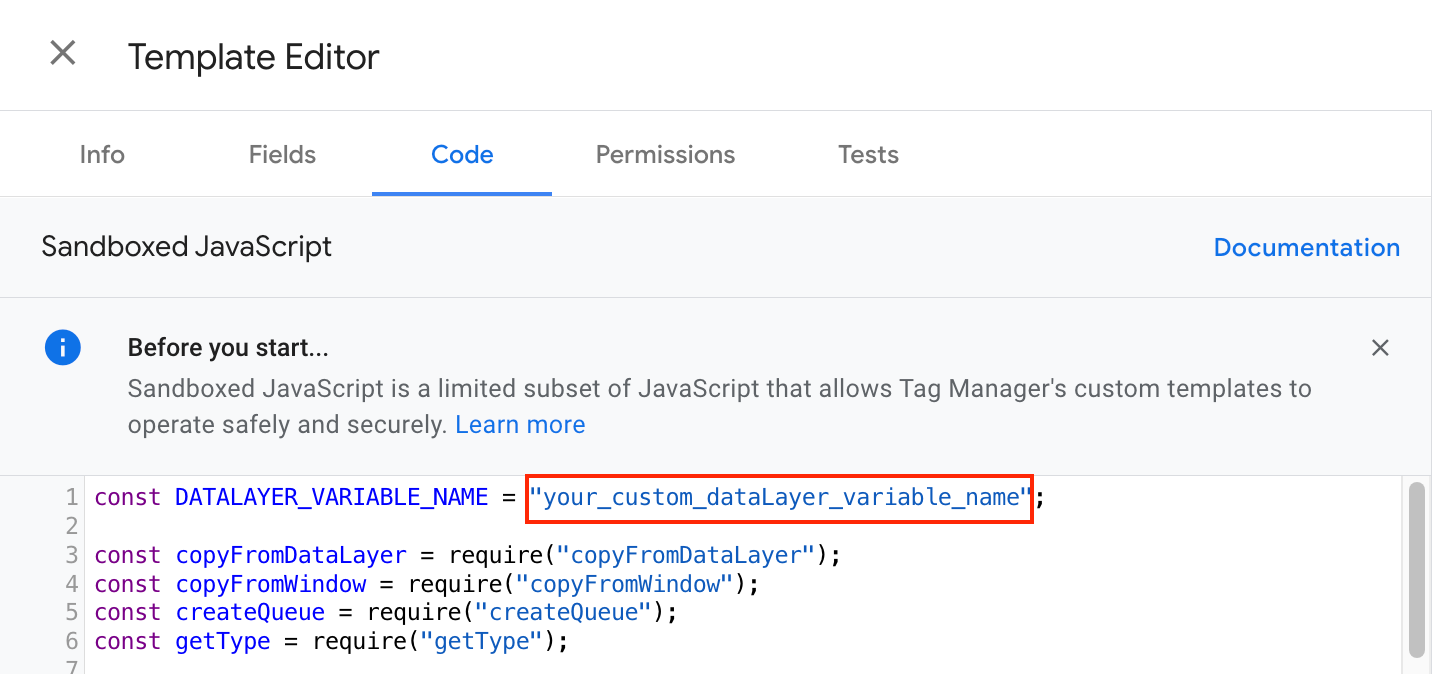
From your GTM dashboard, access Templates > Tag Templates > Wingify Event Streamer > Code.
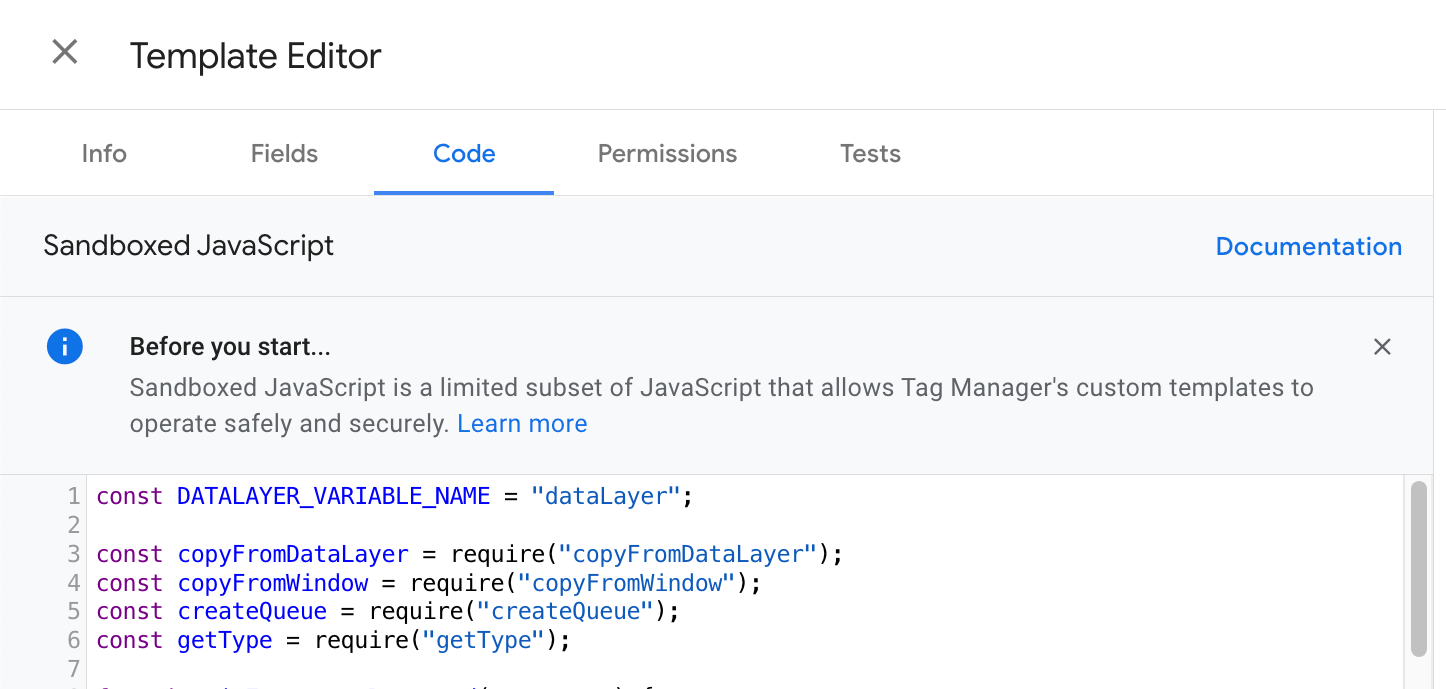
-
In the code, replace “dataLayer”, corresponding to const DATALAYER_VARIABLE_NAME, with your custom datalayer variable name and click Save.
-
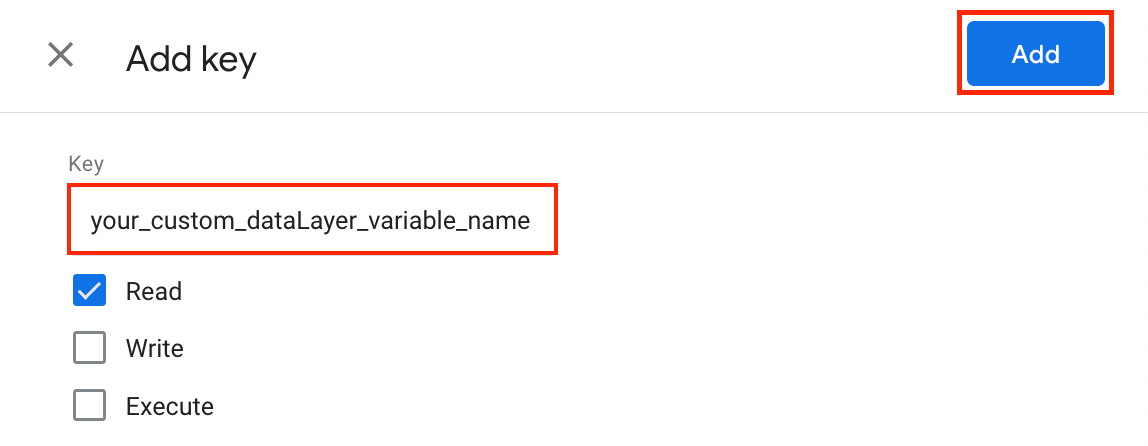
Go to Permissions > Accesses global variables > Add key.
-
In the Key field, enter the name of your custom datalayer variable, select Read, and click Add.
-
Click Save.
Technical Details
- SmartCode Dependency: When the “Feature experimentation” option is OFF, this tag relies on Wingify SmartCode running on the page.
- Via Offline Conversion: When ON, the tag pushes data independently of SmartCode. A valid Wingify Visitor ID is required.
Recommended Best Practices
- While configuring the Wingify Event tag in GTM, map event parameters (Properties) using dynamic GTM variables (typically sourced from the dataLayer) such as orderId or price, rather than using hard-coded static values.
- Maintain consistent naming conventions (camelCase, snake_case).
- For Offline Conversions, use a GTM 1st Party Cookie variable to read _vwo_uuid.
Troubleshooting / Known Issues
-
Issue: Event is not appearing in Wingify
- Verify tag firing using GTM Preview mode.
- Ensure Wingify SmartCode loads before the GTM event fires (if Offline Conversion is not enabled).
-
Issue: Data not linked to the correct user (Offline Conversion)
- Ensure the Wingify Visitor ID field is populated with a valid UUID.
- If undefined, check the GTM cookie variable configuration.
Updated about 1 month ago